The "Inventory Transfer" document registers transfer of goods from one warehouse to another and inventory items from one department to another. E. g. to transport goods to the another sales outlet or to transfer inventory items for production.
To access the "Inventory Transfers" document list, go to the "Warehouse" section (see the figure below).
![]()
The schematic showing how to access the 'Inventory Transfers' documents list
As the list is filled and for convenience of work, you can change its display settings. Click the "More" button in the document list right side toolbar and select "Configure list..." from the drop-down listTo access the Inventory Transfers document list, go to Warehouse > Warehouse Documents > Inventory Transfers.
Generally, Inventory Transfer registers a transfer of inventory items from one location to another one within the same organization: its warehouses, departments, and stores. The following types of transfers are available:
- Transfer: To register the inventory items that were moved from a location in one warehouse to another location in the same warehouse or another warehouse.
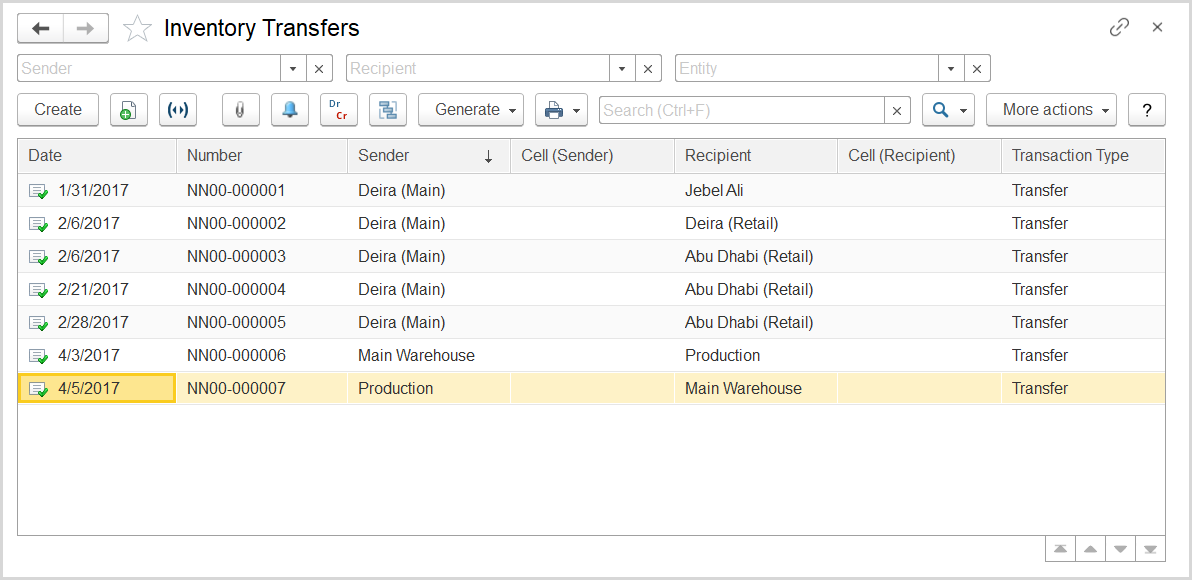
The Inventory Transfers list
The list of Inventory Transfers includes all the Inventory Transfers available in the system. In the list, each document is shown with the document number, date, transaction type, and information about the source and destination warehouses and bin locations between which the goods were transferred.
If you don't see a specific document, rearrange the list by date or document number. You can change the list display settings to suit your particular needs. To learn more about the lists list display settings, see par. Work see Working with the item list.
You can create the inventory transfer document based an Inventory Transfer based on the following documents:
- Goods Receipt Note:
...
- To register the inventory items that were transferred to this warehouse if for the destination warehouse the Separate Inventory and Financial Documents option is selected in its master record on the Warehouses > Master Data > Warehouses form.
- Invoice Received: To transfer the goods received to a wholesale warehouse to other warehouses.
- Requisition: To transfer the goods from a sender warehouse to the destination warehouse.
- Production: To register the goods that were received to warehouses after production.
- Production Order: To register the goods (materials) that were issued for production.
An Inventory Transfer can be used as a basis for the following documents:
- "Receipt Order" (to register receipt of goods and inventory items to the order warehouse);
- "Expense Order" (to issue goods and inventory items expense from the expense warehouse);
- "Additional Expenses" (to show additional expenses regarding this transfer document, e. g. transfer expenses);
To create a document based on the "Inventory Transfer", select the appropriate transfer document from the list, click the "Generate" button and select the required document type. You can do it also by opening the "Inventory Transfer" document. Inventory transfer document data will be automatically inserted in the new documents.
![]()
Form for creating documents based on the 'Inventory Transfer'
To print a document, click the Print button and choose a printing form. The form will be opened for preview, then it can be edited in the Editing mode. To enable this mode, click the "Edit" button on the toolbar above. Then click the "Print" button.
To save a document in the required format (pdf, docx, xls, txt, html, mxl), click the "Print" button. The form will be opened for preview, then you can click the Save button, select the saving location and file format.
To send a document via email, click the "Print" button. The form will be opened for preview, then you can click the Send button, select the file format and enter the receiver's address.
To see the documents related to the current one (hierarchy structure), click the View Hierarchy Structure button. The window containing all the related documents appears. You can open each of these documents (double-clicking it), repost, undo posting or mark for deletion (
,
and
buttons on the left toolbar). You can view the hierarchy structure from the list, or from each document by clicking the corresponding button in a form.
To attach or view files that are already attached to the document, click the Attached files button. In the displayed window you can add a file ("Create" button) or open an existing one for view/editing (
, "Edit" and "Post and Close" buttons). You can view attached files either from the list, or from each document by clicking the corresponding button in a form.
...
- Goods Receipt Note: To register the inventory items that were received to the destination warehouse after transfer from another warehouse if for destination warehouse the Separate Inventory and Financial Documents option is selected in its master record on the Warehouses > Master Data > Warehouses form.
- Goods Dispatch Note: To register the inventory items that were issued from "sender" warehouse for a transfer to another warehouse. Documents of this type are used only for warehouses for which the Separate Inventory and Financial Documents option is selected in their master records on the Warehouses > Master Data > Warehouses form.
- Additional Expenses: To register the change in inventory costs associated with transferring the goods.
- Customs Declaration: To clear with customs the items that were transferred from a warehouse in the free zone to a warehouse on Mainland.
- Transfer Order: To order further transferring of the items.
The toolbar buttons
To manually create a new document of the Inventory Transfer type, click the Create button on the toolbar.
To create a document based on a selected inventory transfer, click the Generate button, and select the required document type. The data from the inventory transfer will be automatically copied to the new document.
To edit an existing document, double-click the line with the document in the Inventory Transfers list. You can also select the line, right-click it, and select Edit or click More actions > Edit on the toolbar.
If you need to print the selected document, send it by email, or perform other operations, refer to List Toolbar.
See also
| Page Tree | ||
|---|---|---|
|