-
Created by
 Implementation Department, last updated by Olga Kaya on 30 Mar, 2026
4 minute read
Implementation Department, last updated by Olga Kaya on 30 Mar, 2026
4 minute read
1. How to Edit a Document View (Document Form)
Use this option when you want to:
hide unnecessary fields in a document;
add additional fields;
change field formats (date, precision, etc.).
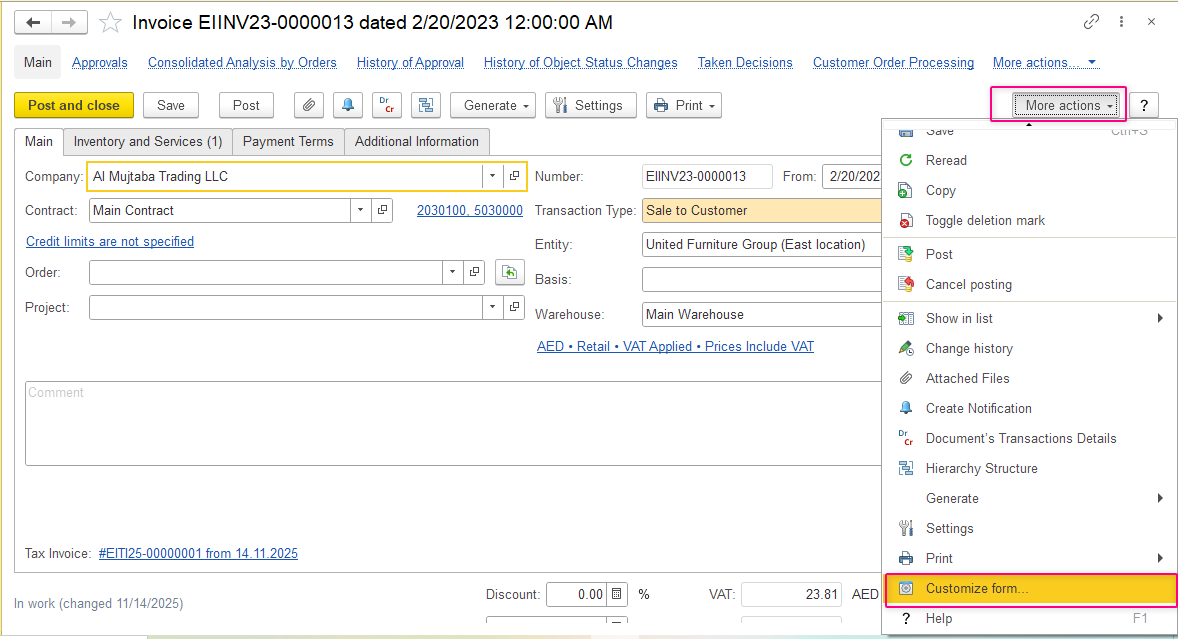
Step 1. Open Customize Form
Open the required document.
Click More actions → Customize Form.
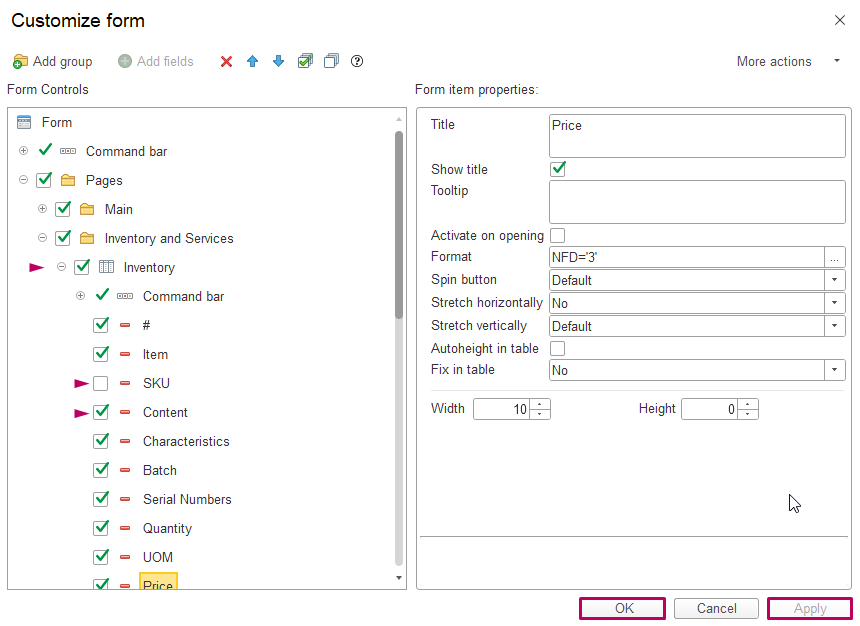
Step 2. Show or Hide Fields
In the Customize Form window: tick fields you want to display; untick fields you want to hide.
Click Apply or OK.
The document form will update immediately.
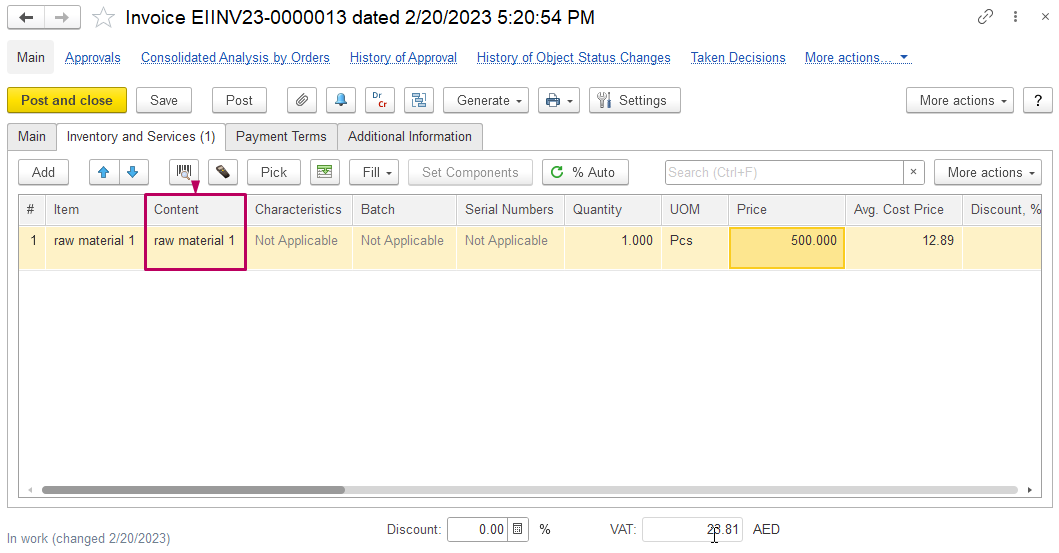
Required fields appear or disappear on the tab:
Step 3. Add a Field Not Visible by Default in the Document
In the Customize Form window click Add Field.
Select the required attribute (including related fields if needed).
Confirm the selection with Ok and Apply buttons
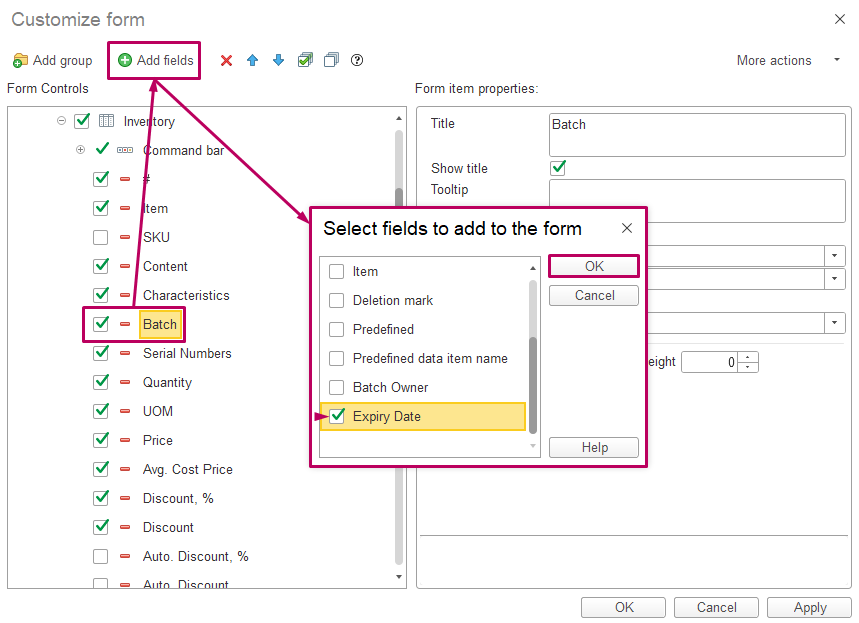
The selected field will appear in the document.
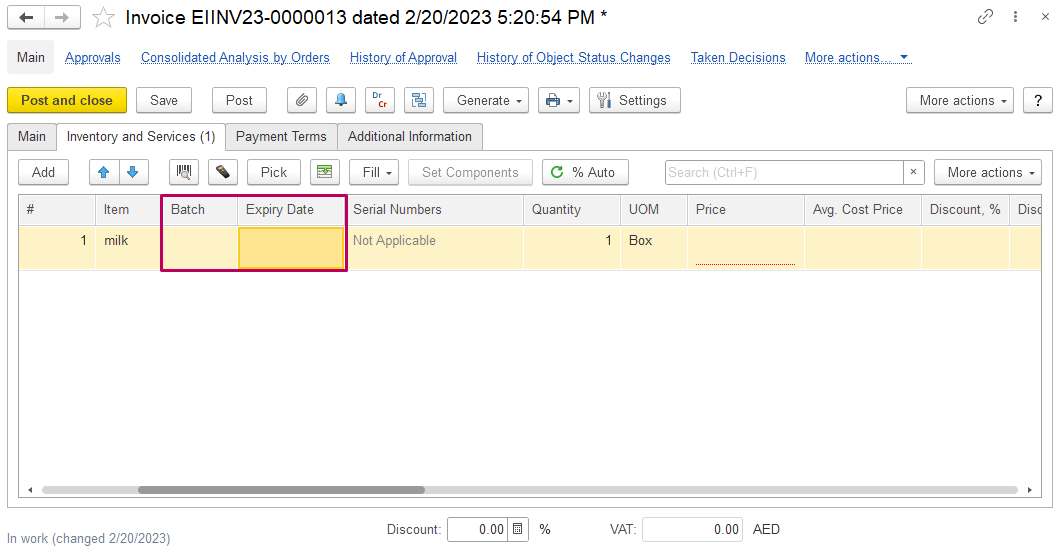
Step 4. Change Field Format
Select the field.
Click Format on the right panel.
Set required parameters (for example: number precision; date format).
Click Apply.
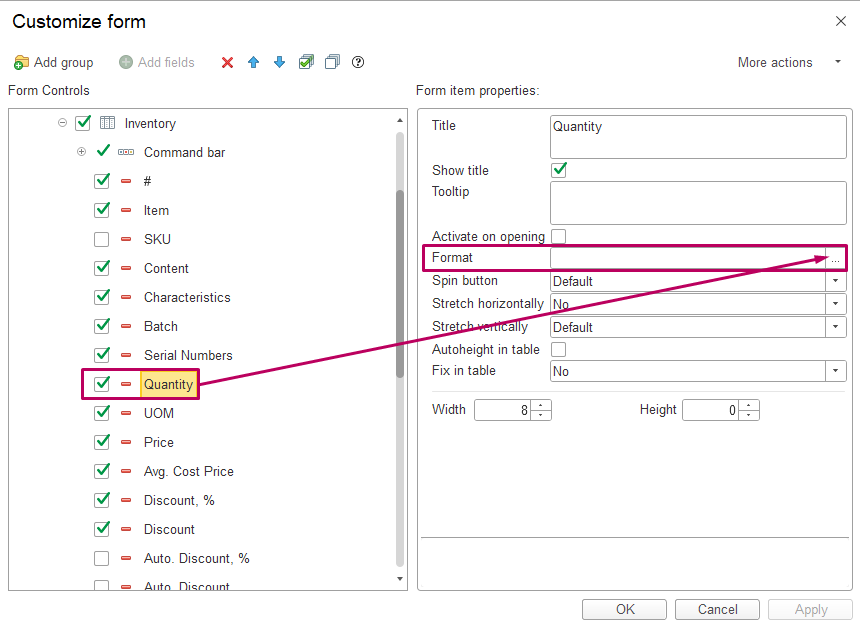
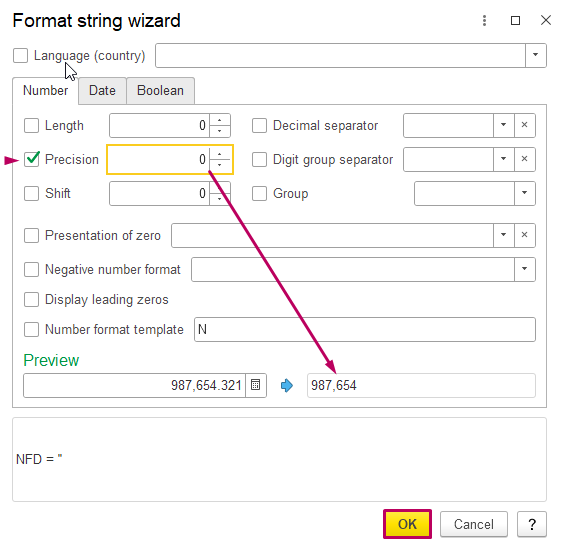
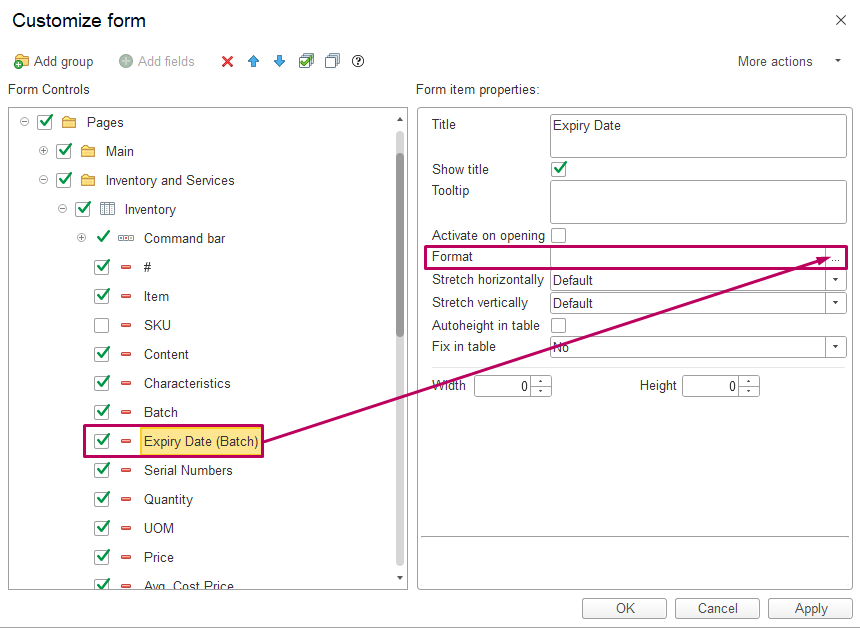
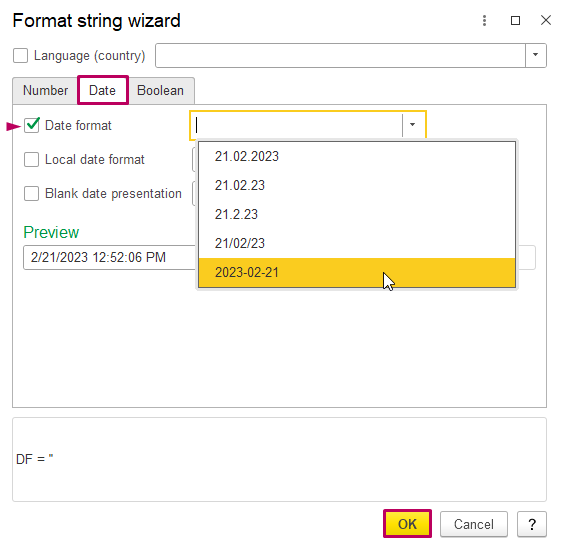
Apply settings to receive corresponding view in the document: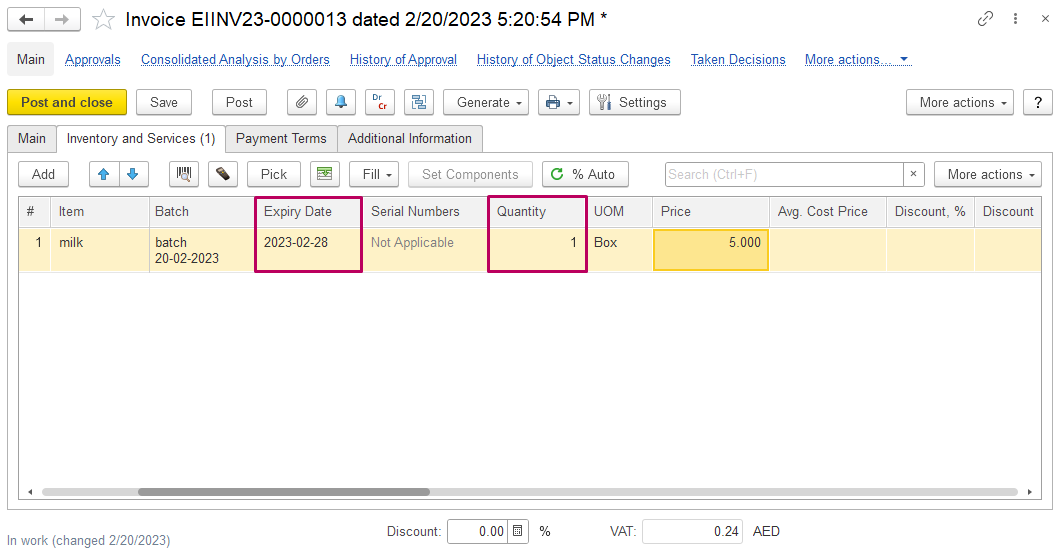
2. How to Customize a List View (List Form)
Use this option when working with:
document lists (Invoices, Payments, Projects);
catalogs (Items, Customers);
registers.
Step 1. Open Customize Form for a List
Open the required list form.
Click More actions → Customize Form.
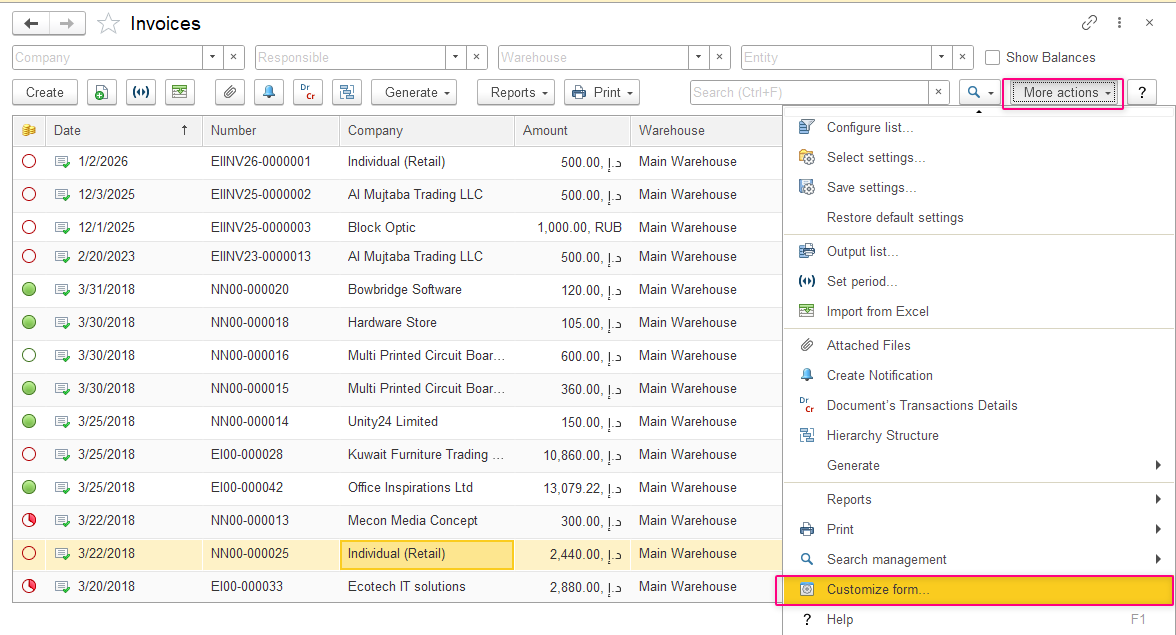
Step 2. Main Sections in Customize Form Window
In the Customize Form window, you can configure the following sections:

1️⃣ Fast Filters Panel
Displays filters at the top of the list.
You can: show or hide existing filters; add additional filter fields.
2️⃣ Command Bar
Contains action buttons (Create, Post, Print, etc.).
Buttons can be shown or hidden per user needs.
3️⃣ User-Defined Settings Group
Allows creation of custom filters with comparison logic
(for example: Amount > User Value).
4️⃣ List (Columns)
Controls: visibility of columns; column order; column titles and formatting.
3. Changing Visible Columns in a List
Users can:
add or remove columns;
change column order (drag & drop or arrows);
edit column titles and width.

Example: Add “Responsible” Column to Invoices List
Open Customize Form.
Go to Form → List.
Find the Responsible field and tick it.
Change the Title to:
“Responsible for the document”Click Apply and OK.
The column will appear in the list with the new title:

4. Filtering and Search in List Forms
Filters can be added and managed via Fast Filters.
Users can: filter data by required fields; adjust filter titles and appearance; reuse filters during daily work.

Filters configured via Customize Form are available directly in the list view.
5. Saving and Restoring List Settings
If you want to reuse your customized view:
Click More actions - Save Settings.
The system will save your personal list configuration.

Restore Default Settings
If you no longer need custom settings:
Click More actions - Restore Default Settings.
The list or document form will return to the standard system view.

Best Practices
- Use Customize Form to adapt the interface to your task
- Save settings only if you plan to reuse them
- Restore defaults if the form becomes overloaded
- Remember: changes affect view only, not accounting data
Summary
Customize Form is the main tool for customizing document and list views.
It allows flexible UI adjustments without affecting system logic.
Proper use improves efficiency and user experience in FirstBIT Software.
Thank you for being a FirstBIT customer!