This topic describes how to create a new sale with the POS interface.

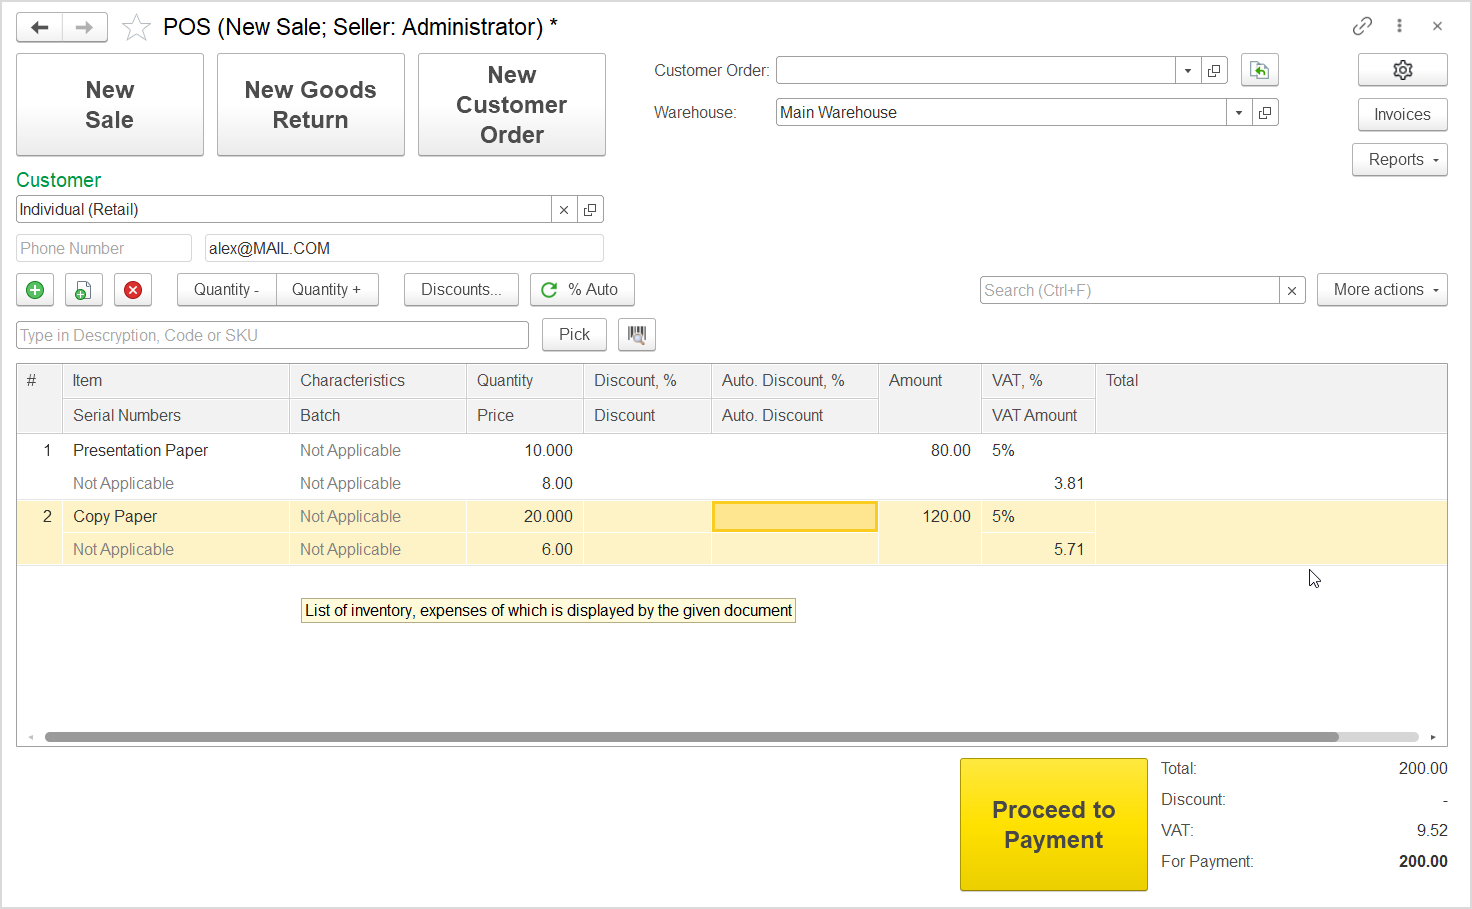
The POS Interface. A new sale
- Click the New Sale button to initiate a new sale. A new sale can be done for an instant customer or based on a customer order posted earlier in store, online, or by phone.
- Make sure the Customer field shows the retail customer name. Otherwise, start typing the name and then, select the corresponding customer from the drop-down list.
- If the customer has a posted order, to locate this order, you can enter the customer phone name or email in the Customer field and then select the required order in the Customer Order field. Alternatively, you can enter the customer order number in the Customer Order field. Click the Fill by button to the right of the Customer Order field. Notice that only customer orders in the In Process status will be available for selection. Go to Step 10.
- if If the customer does not have an order, click the Add
 button to add a line. A drop-down list of recently used items appears, select an item from this list or click the Show All link to open the list of all items. Alternatively, use the barcode scanner to add an item.
 - By default, an item is added with the quantity 1. Use the Quantity+/Quantity+-
 buttons to set the required quantity of the item.
 - Make sure the price is shown in the corresponding lines or enter the prices manually.
- Check that automatic discounts (if any) are applied.
- Click the Discounts button to review the applied (if any) discounts or to apply a new discount.
...

The Discounts dialog box
9. You can specify the discount in the input box on the top of the dialog box and then select the discount type by using the following 3 buttons:
...
%, Amount, New Price.
10. Select the discount application option: to the selected row or to the entire document.
11. Click Apply and close the dialog box.
12. Review the document lines and click Proceed to Payment in the lower area of the form. The Payment dialog box opens.
...
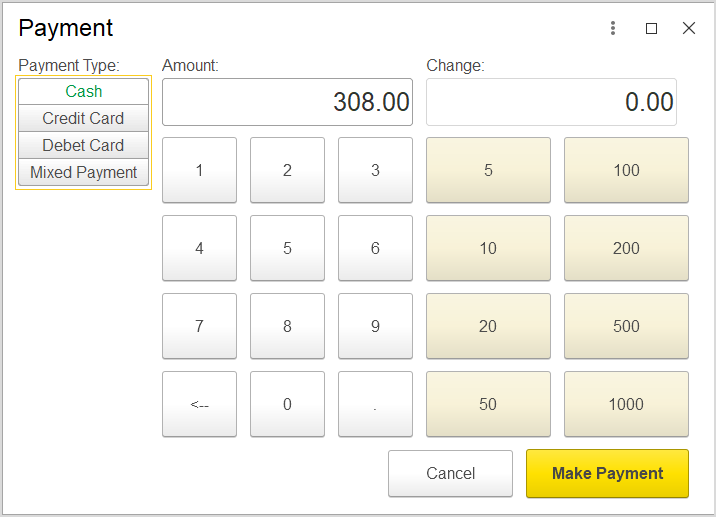
The Payment dialog box. The sale amount
13. Make sure the amount is correct. Select the payment type from the following options:
Cash Credit Card, Debit Card, Mixed Payment ( this list may be different in your system).
Cash payment type or a payment type configured for payments made with bank cards. The Payment dialog box opens.
14. For cash payment, use the yellow buttons (to the right) to enter the amount given by the customer and view the change amount in the Change box. The Amount box now shows the amount received from the customer.

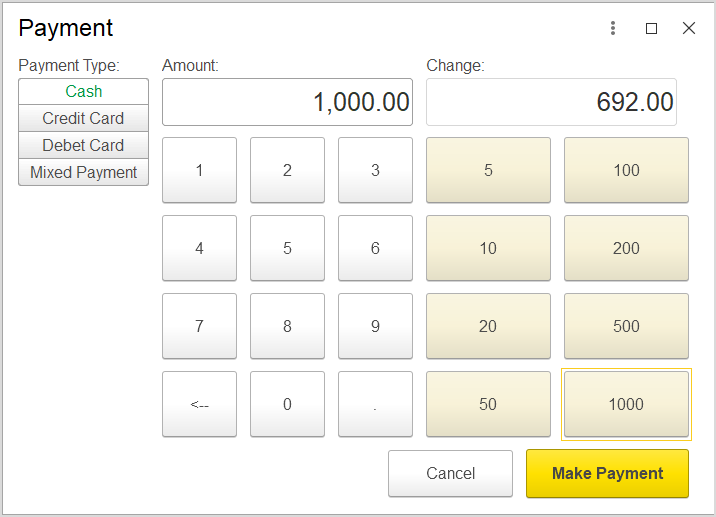
The Payment dialog box. The payment and change amounts
15. Click the Make Payment button. This initiates generation of the a Commercial Invoice and Cash Receipt.
This Commercial Invoice
...
can be printed and handed over to the customer.
...
 The Commercial Invoice generated for the customer