-
Created by
 Daria Tikhova, last updated on 24 Aug, 2026
5 minute read
Daria Tikhova, last updated on 24 Aug, 2026
5 minute read
Overview
The Import from Excel functionality allows users to upload Time Card data from an Excel file directly into the Time Card document.
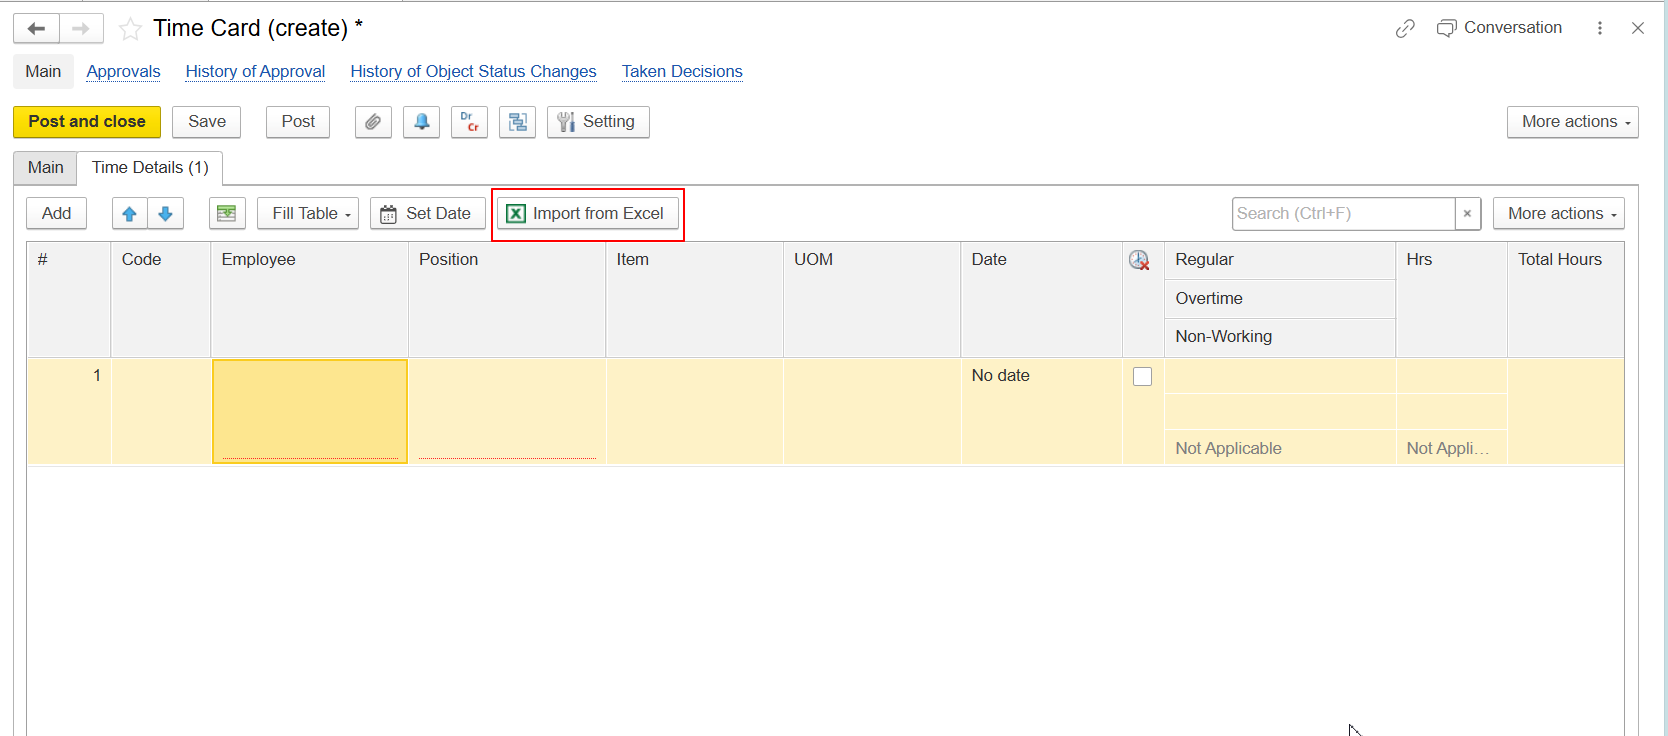
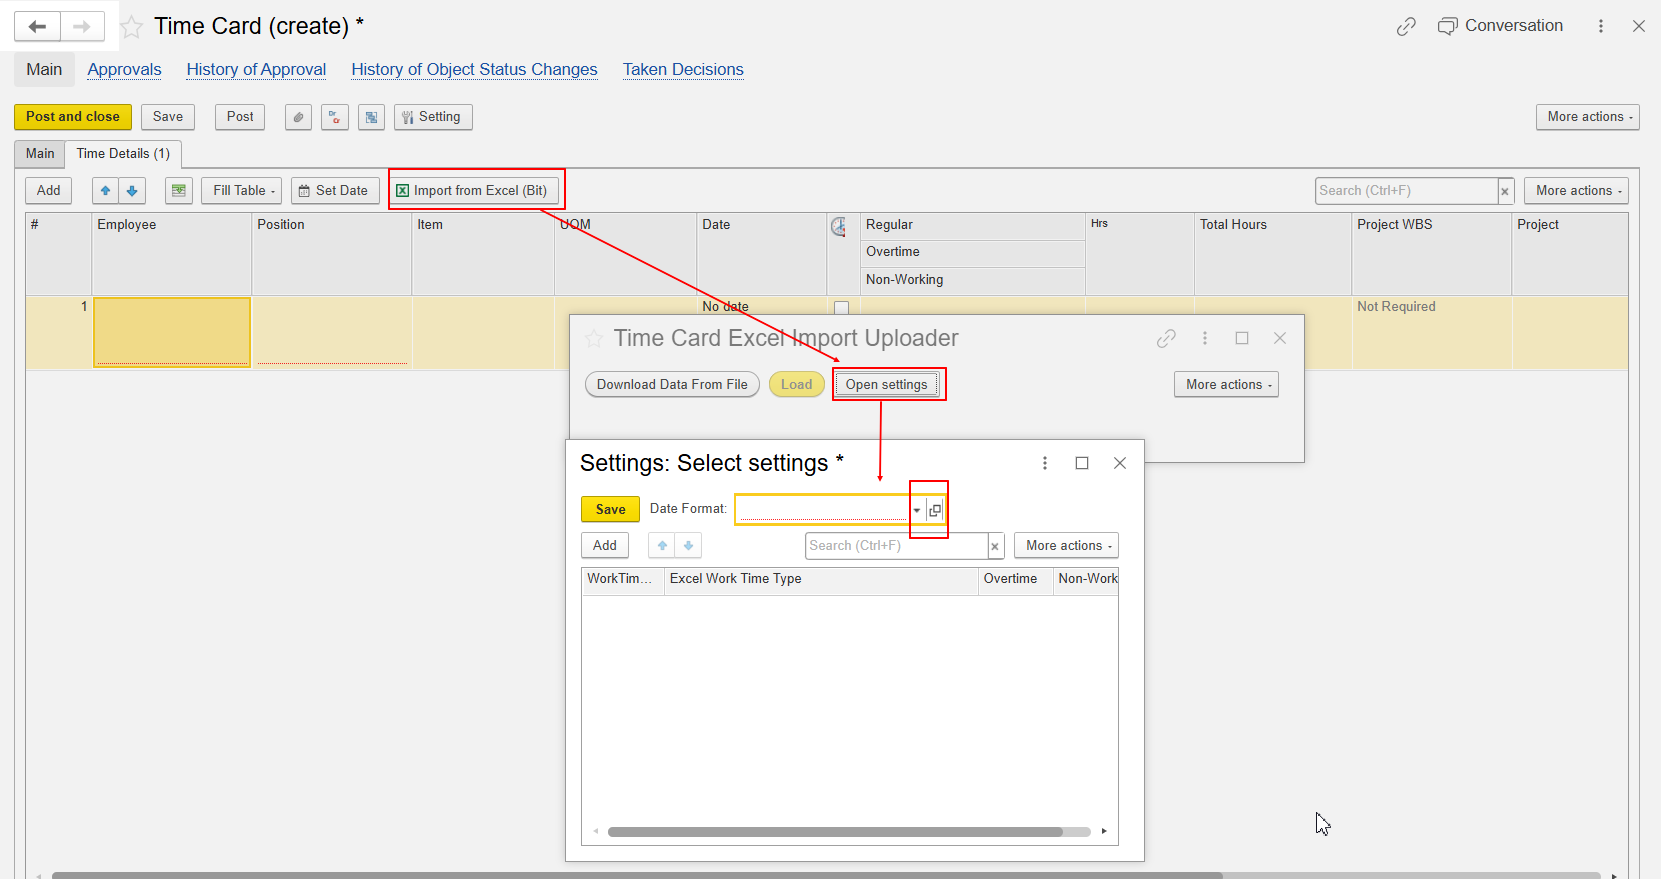
Starting from Contracting release version 2.1.1.35, a standard Excel import process became available for Time Card documents.
Before release 2.1.1.35, Excel import was not included as standard functionality. If an Excel upload process was required, it could be implemented by creating a customer-specific template or by applying additional customization.
In release 2.1.1.35, the standard import functionality was introduced as a separate extension.
Starting from release 2.1.1.36, the Import from Excel functionality is included in the standard product package and is available directly from the Time Card document grid without additional installation.
Before using the import functionality for the first time, a one-time configuration is required. After the initial setup is completed, the selected settings will be automatically applied to all future imports.
Availability
The Import from Excel functionality is available:
- As a separate extension in Contracting release 2.1.1.35. To enable this functionality, please contact the Hotline Support team.
- As part of the standard product package starting from Contracting release 2.1.1.36.
Initial Configuration
Before performing the first import, configure the following settings.
Configure Date Format
- Open the Import from Excel settings.
- Select the required date format from the available options. Open the list of available date formats in the Common formats folder. Select the date format that matches the format used for dates in your Excel file.
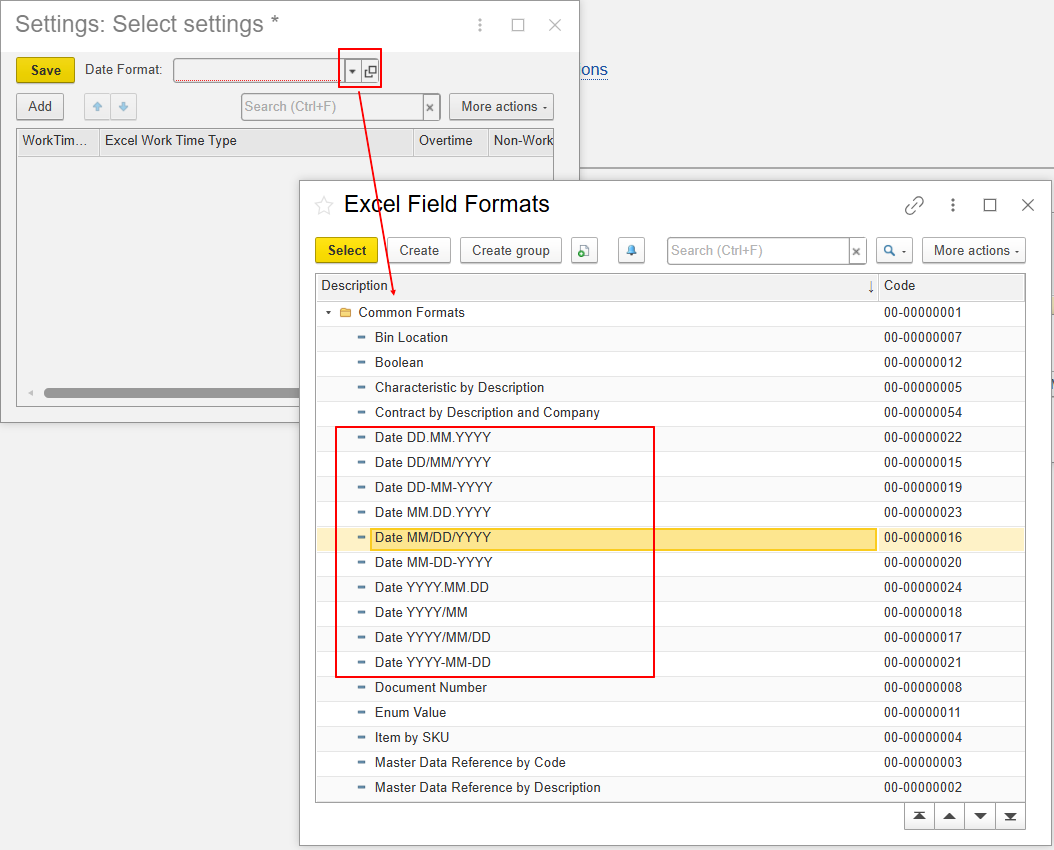
3. Save the configuration.
The selected date format will be used by the system to correctly interpret dates in uploaded Excel files.
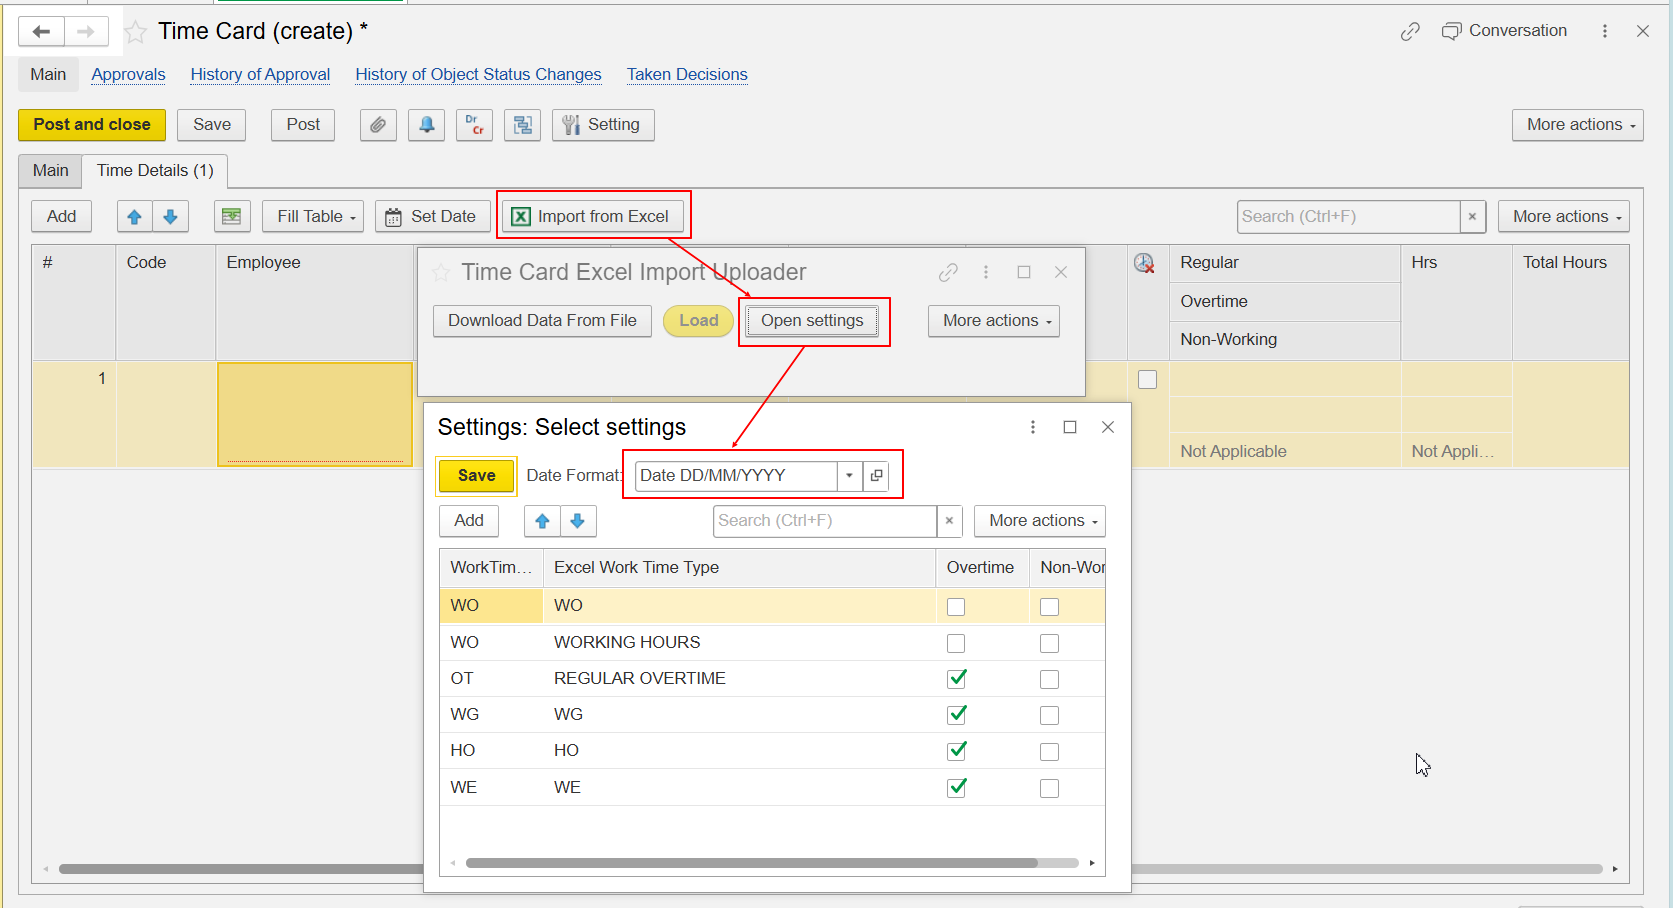
Configure Time Type Mapping
To ensure that Time Card entries are imported correctly, configure the mapping between:
- Time types used in the Excel file.
- Time types available in the system.
Before configuring the mapping, check the Time Types available in the system.
Go to HR and Payroll → See Also → Work Time Types.
For each time type used in the Excel file, create a corresponding mapping to the required Work Time Type from the system.
Use the Overtime and Non-Working checkboxes to specify where the imported hours should be recorded in the Time Card line. Depending on the selected setting, the imported hours are assigned to the corresponding time type column, such as Regular, Overtime, or Non-Working.
For example, select Overtime for a time type that represents overtime hours. Leave both checkboxes unselected for regular working hours.
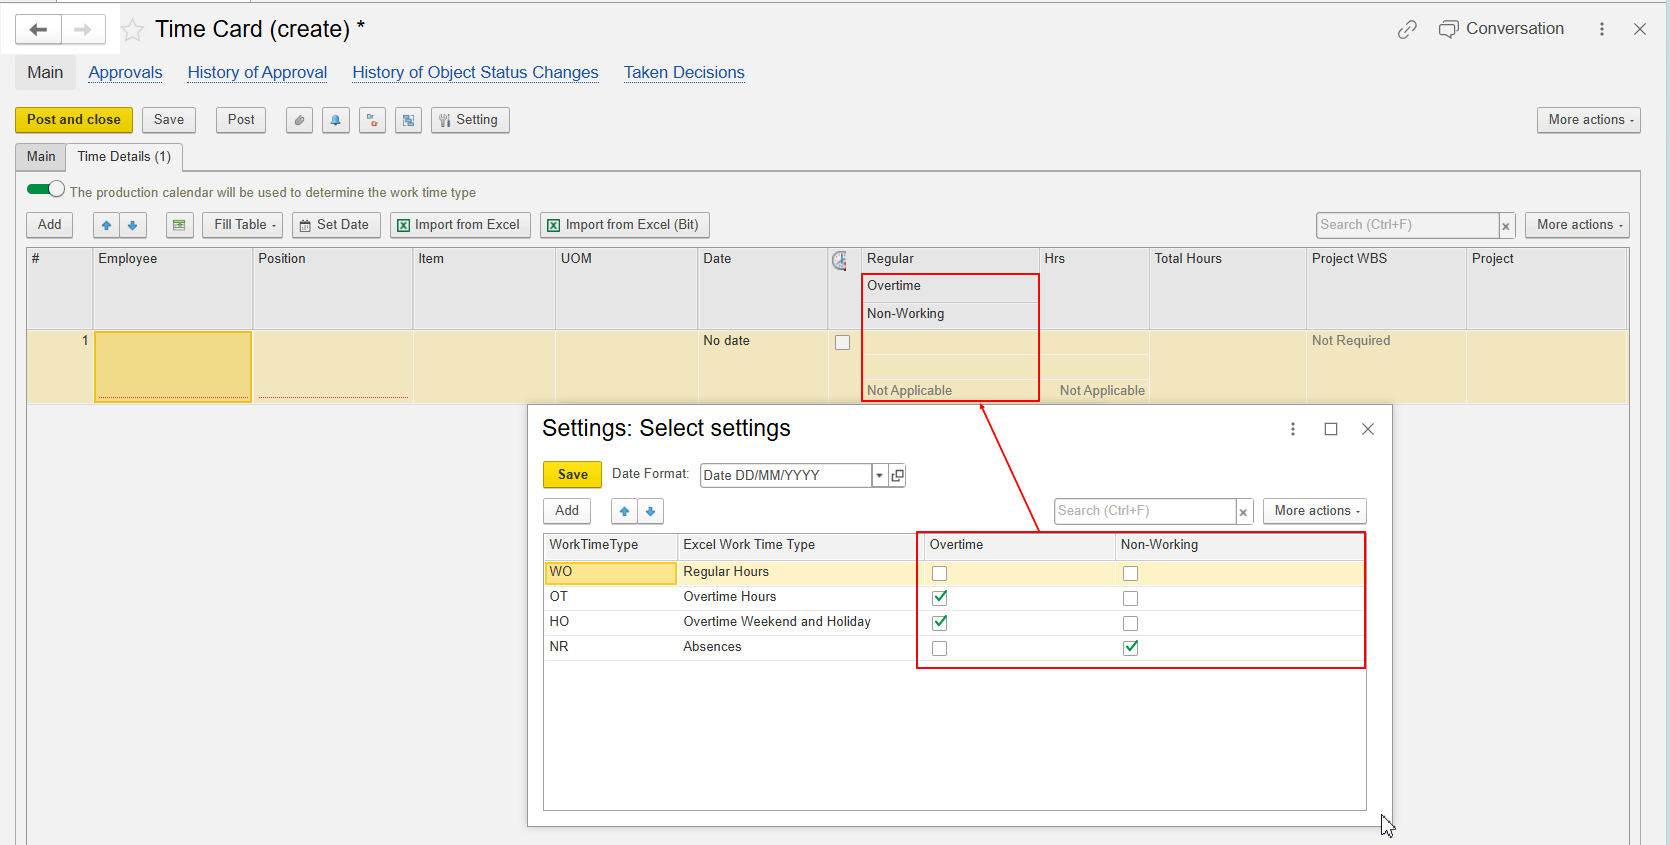
Important: The value entered for the Excel Time Type must exactly match the value used in the Excel file. The system considers letter case, spaces, and other characters when matching the value. If the value does not match exactly, the Time Type may not be recognized during import.
Example:
| Value in Excel | System Work Time Type |
|---|---|
| Working hours | WO |
| REGULAR OVERTIME | OT |
In this example, the values Working hours and REGULAR OVERTIME must be entered in the mapping exactly as they appear in the Excel file.
Make sure that all time types that may appear in your Excel files are included in the mapping configuration.
Example:
| Excel Time Type | System Time Type |
|---|---|
Working hours | WO |
| REGULAR OVERTIME | OT |
| WO | WO |
| WG | WG |
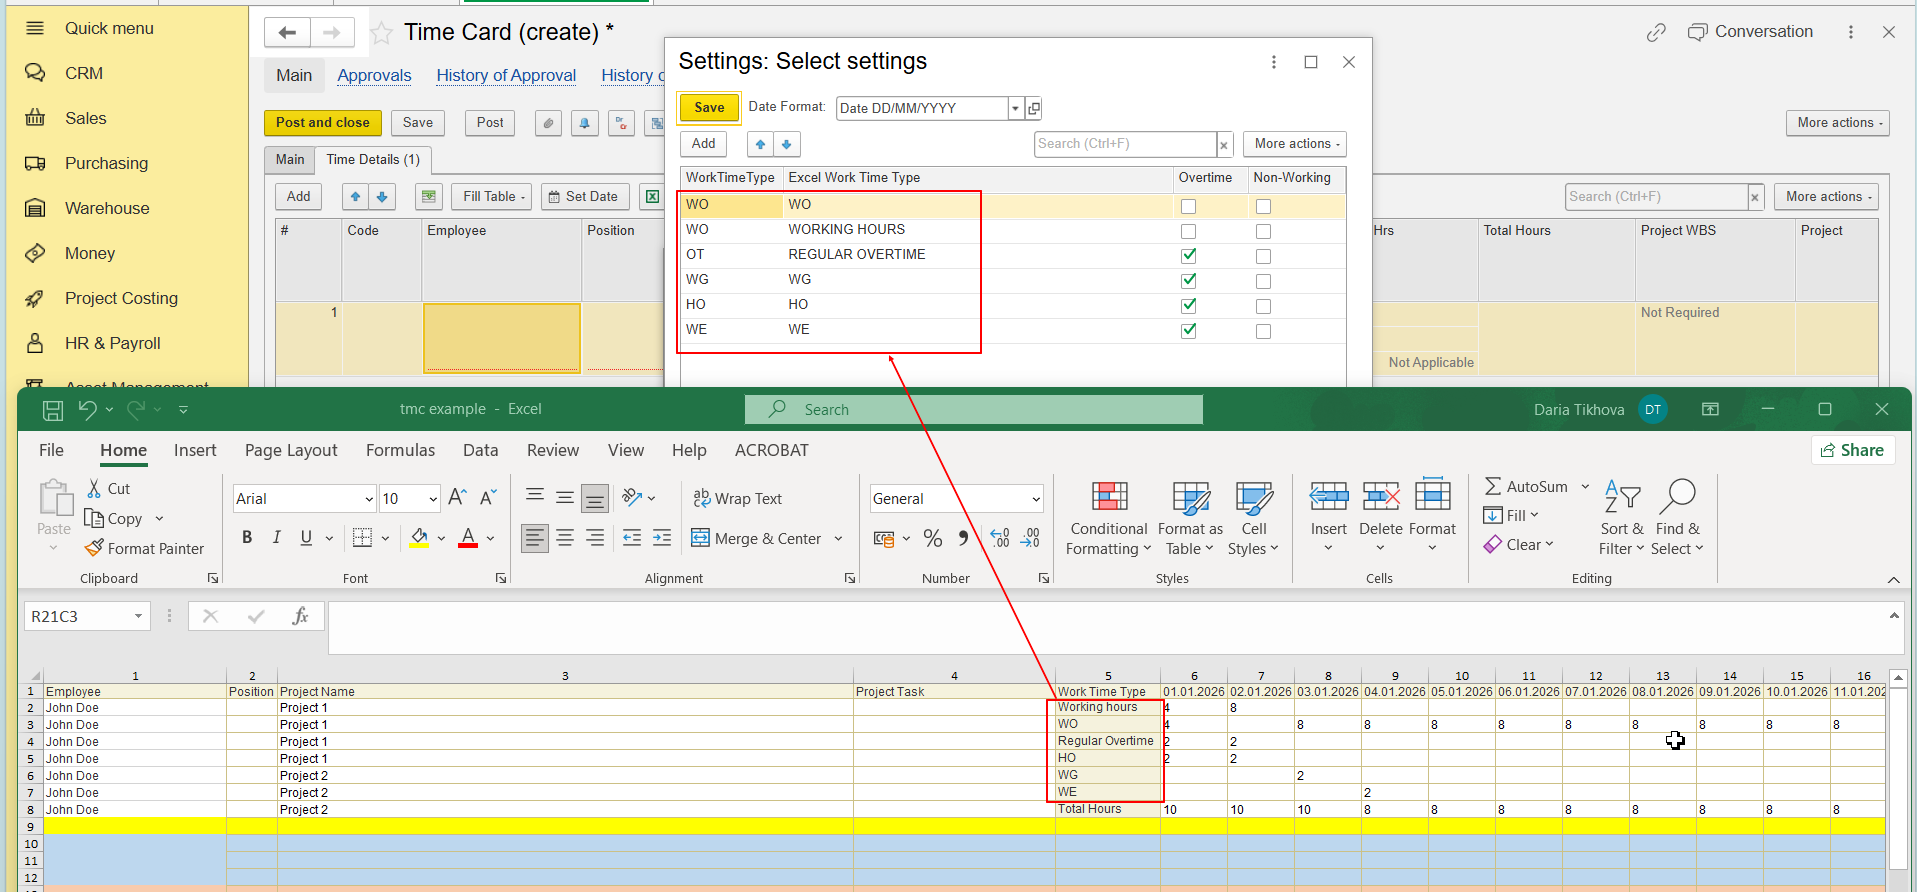
Import Data from Excel
After the initial configuration has been completed:
- Open the required Time Card document.
- Navigate to the document grid - Time Details tab.
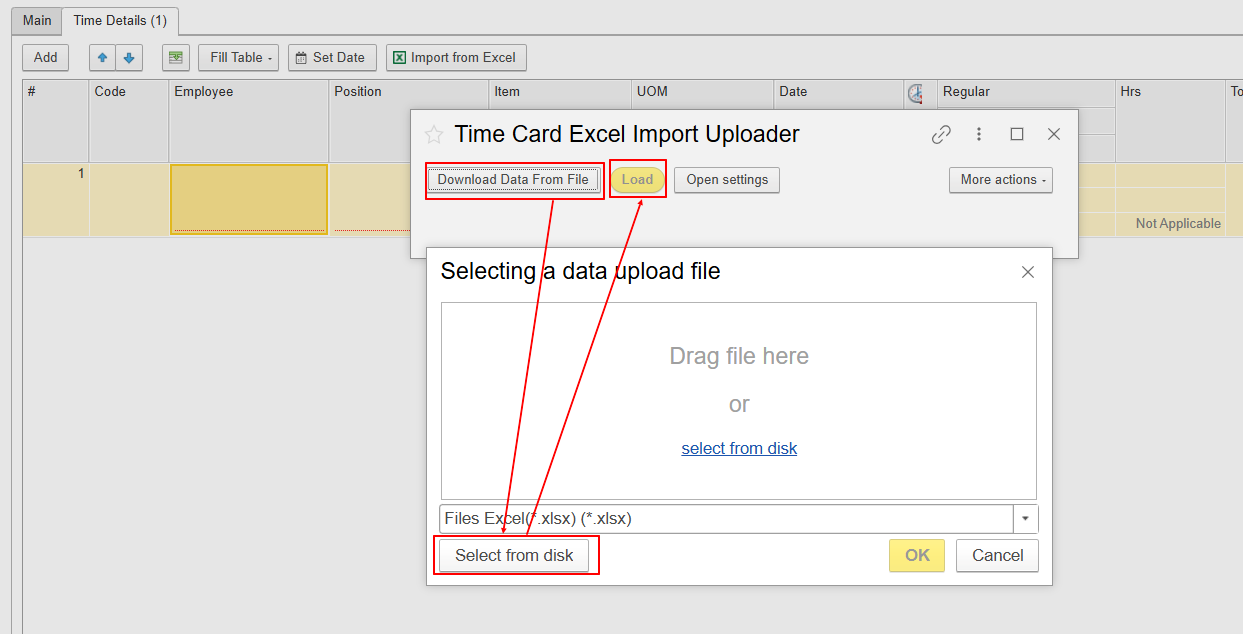
- Select Import from Excel option.
- Push Download Data From Excel option.
- Select excel file on computer with Select From Disk and ther push Load option.
- Select required document lines.
Before uploading the file, manually enter the dates for the required month.
The Excel file must be prepared and edited manually before it is uploaded to the system.
Excel File Requirements
For a successful import, ensure that your Excel file:
- follows the required data structure;
- uses the configured date format;
- contains Time Types included in the Time Type Mapping settings;
- contains only employees who are already created in the system.
Employees
All employees specified in the Excel file must already exist in the system.
The Import from Excel functionality does not create new employees automatically. Data for employees who are not available in the system will not be imported.
A sample Excel template is provided with this user guide and can be used as a reference for preparing your import file.
You can download the Excel template here, fill it in with your Time Card data, and upload the completed file to the system using the Import from Excel functionality.
[
Future Imports
Once the initial configuration has been completed, the system will automatically apply the saved settings during future Excel imports.
No additional configuration is required unless the date format or Time Type Mapping settings need to be updated.
Thank you for being FirstBIT customer!