...
- On the list of existing credit notes, select the customer company in a no-name field in the upper area of the form and click Create.
- The Credit Note (Create) form opens.
- On the Main tab, in the Transaction Type field, select Goods Return or Invoice Correction.
- Make sure the link below the fields contains Prices Include VAT. Otherwise, click the link to open the Prices and Currency dialog box, select the Prices Include VAT check box there, and close the dialog box.
- In the Basis field, select the invoice for which return is being recorded. Click the Fill in by Basis button to the right of the field.
- On the Inventory tab, review the lines from the original invoice. Specify the quantities of the items returned and delete the lines (if any) for which there are no returns.
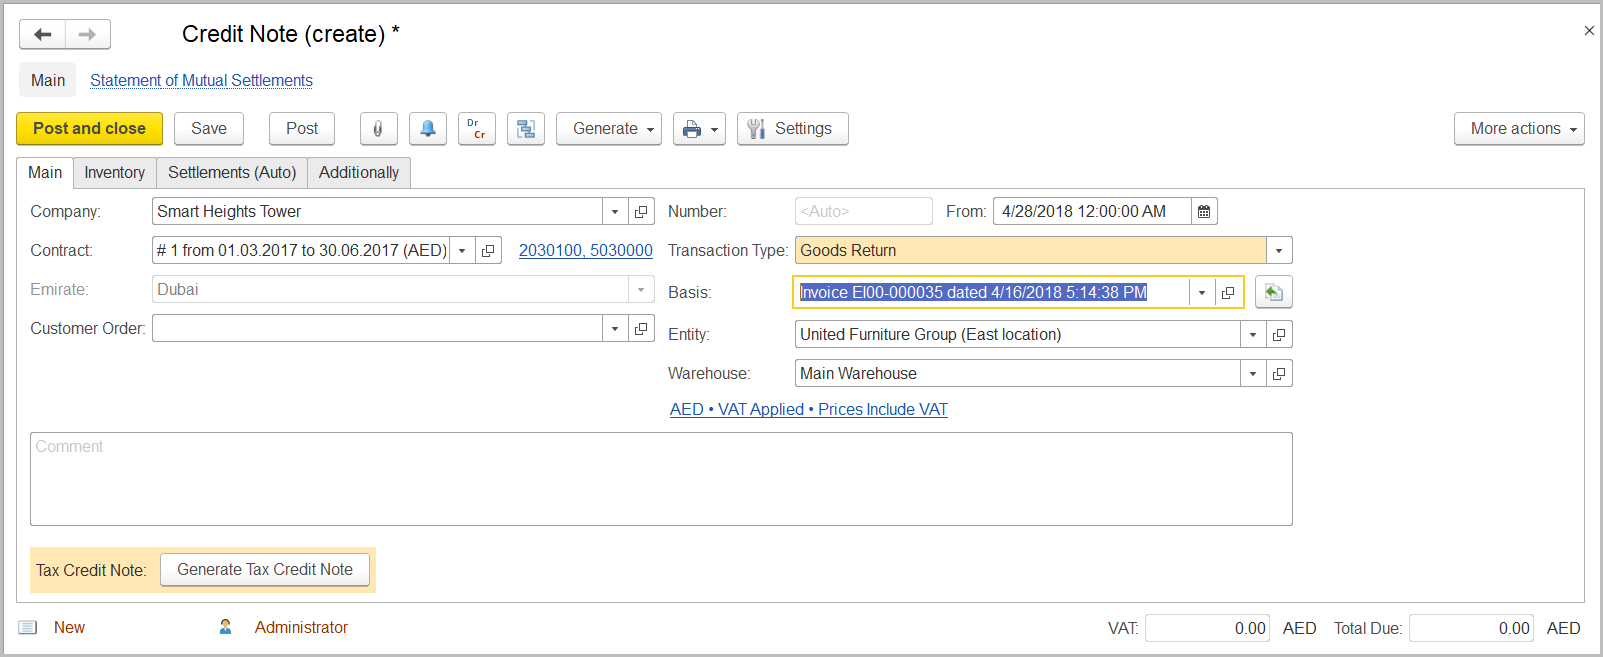
- In the VAT, % column, make sure the correct VAT rate is specified for each returned item.

- On the Settlements tab, click the Fill by Balances button and in the line, which appears, select the Advance check box.
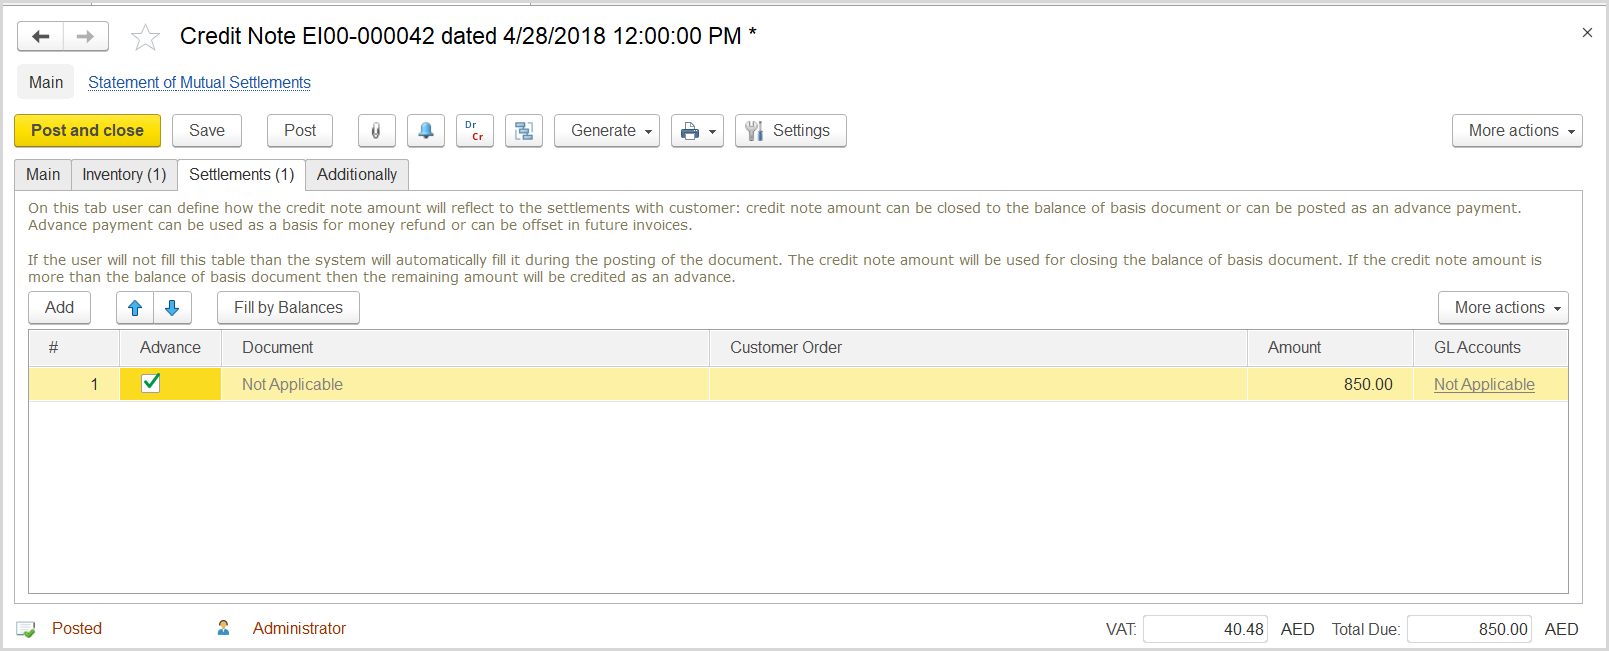
- Click Save and then Post.
...
- Click Create to create a new Output VAT Transaction.
- In the Company box, select the customer.
- In the TransactionType field, select Advance Payment.
- In the Adjustment Type field, select Increase.
- Select the Generate GL Transactions check box.
- Make sure the link below the fields contains PricesInclude VAT. Otherwise, click the link to open the Prices and Currency dialog box, select the PricesInclude VAT check box there, and close the dialog box.
- In the Basis field, specify the credit note created for the return.
- Click Save to assign the number to this document.
- On the Inventory/Services tab, click Add to append a new line.
- In the Contents column enter any comment to the transaction, for instance resulting return amount.
- In the Amount column, enter the return amount minus the amount of the customer debt.
- In the VAT, % column, select the applicable rate, 5%.

- Click Post to register the document in the system.
- On the Main tab at the bottom, click the Generate Tax Invoice button. A link to the generated tax invoice appears.

- Click the link to review the tax invoice. On the command bar of the tax invoice, click the
 button to view the GL journal entries for the document.