Problem: How to apply filter to Document's List?
Solution: Use option Configure List as shown.
This guide explains how to customize document lists in FirstBIT Software, with a primary focus on the Configure List option.
Using these tools, users can:
filter documents by required criteria;
adjust visible columns;
simplify daily work with large volumes of data.
Key Concepts
In FirstBIT Software, document lists (for example, Invoices, Payments, Projects) can be customized in two main ways:
Configure List – used mainly for filtering and quick list setup
Change Form – used for deeper customization of list appearance and structure
This guide focuses mainly on Configure List, while Change Form is mentioned for context.
1. Applying Filters Using “Configure List” (Main Functionality)
When to Use
Use Configure List when you need to:
filter documents by currency, status, date, amount, etc.;
temporarily narrow down the list;
work with a subset of documents.
Step 1. Open Configure List
Open the required Document List (for example, Invoices).
Click More actions - Configure list.
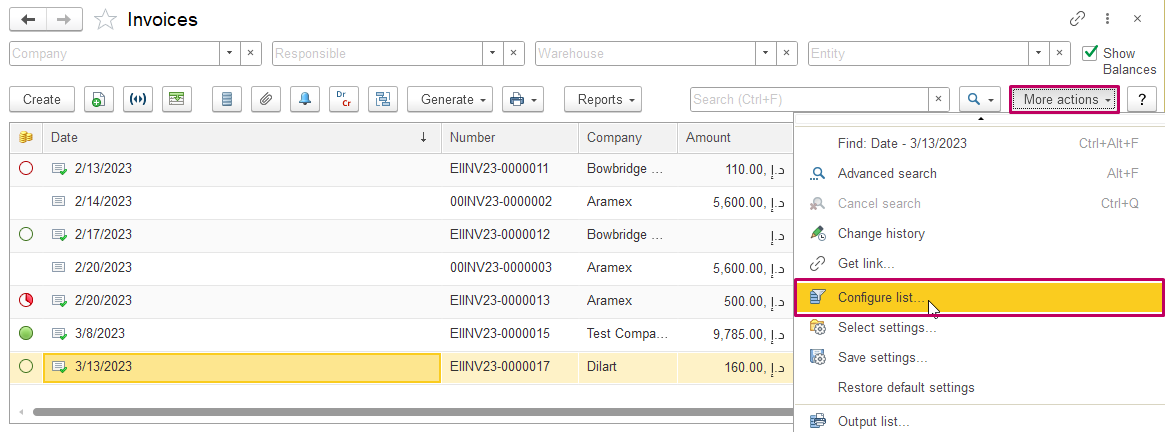
Step 2. Set Filters
Go to the Filter tab.
Select a field from Available fields.
Define:
Comparison Type (e.g. Equals, Greater than, Contains);
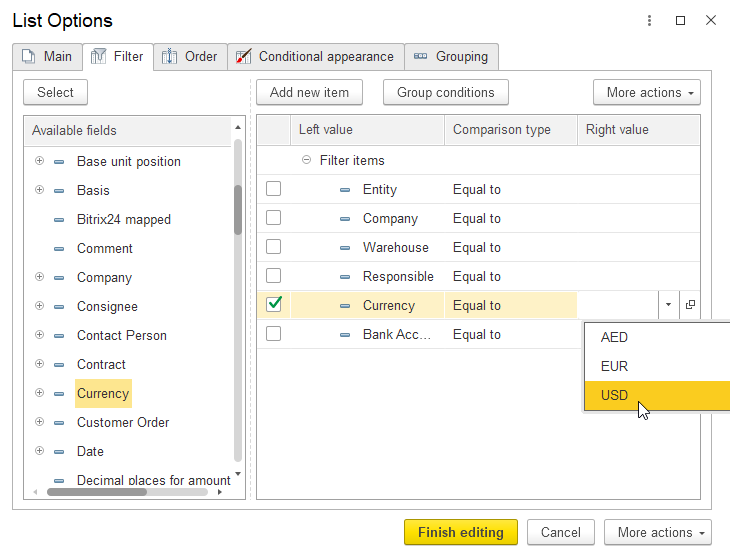
Value (Right Value).
Example:
Filter invoices where Currency = USD.
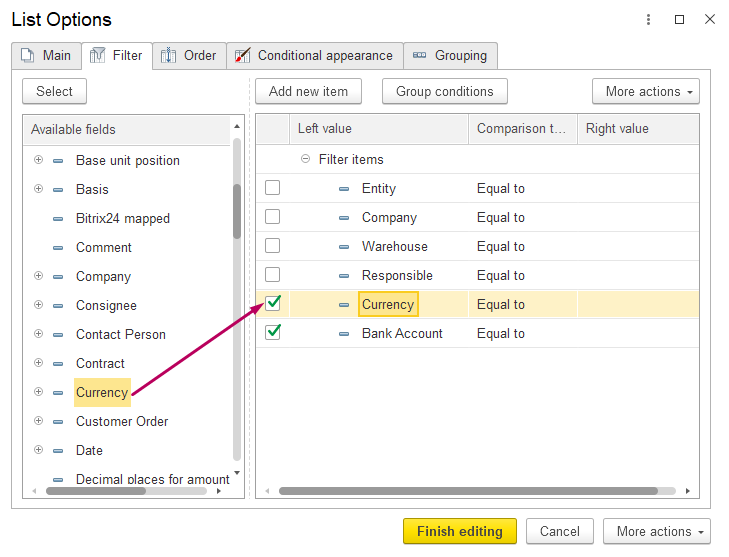
Below example how to set required Comparison Type and Right Value for it: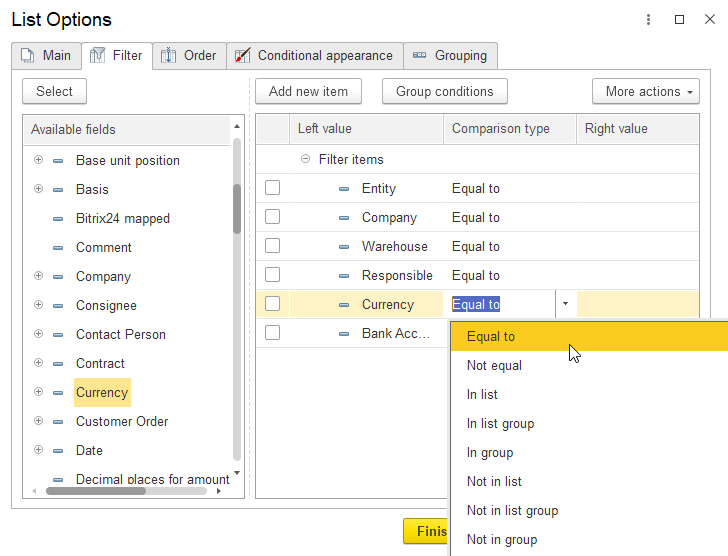
Important Notes on Filters
Filters can be:
predefined in the list form;
or left empty and filled directly in the document list.
Filter values can be changed quickly using the filter panel in the list view.
Step 3. Saving filters
- Finish the editing, so documents list is filtered as defined (for example, only Invoices in USD are shown):
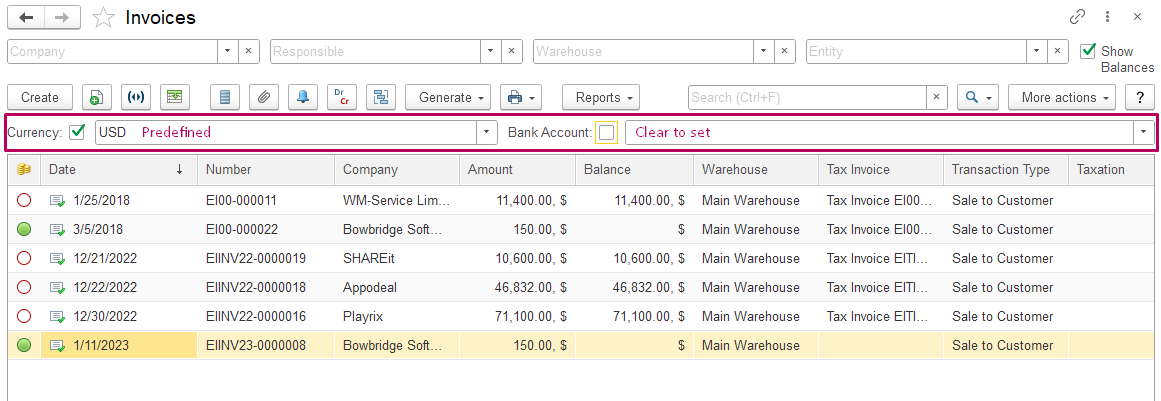
2. Choose values on the panel and use filters as usual: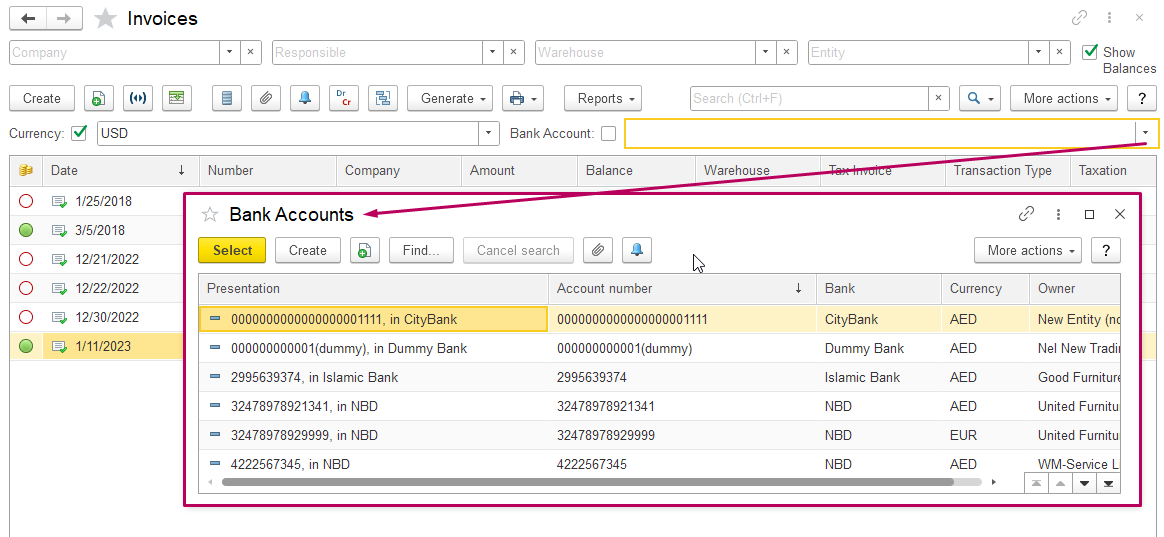
2. Using Filter Panel in the Document List
After configuring filters:
Filter fields appear at the top of the document list.
Users can:
enter values;
clear filters;
reuse them without reopening Configure List.
This makes daily work faster and more flexible.
3. Difference Between “Configure List” and “Change Form”
| Option | Purpose | Typical Use |
|---|---|---|
| Configure List | Filtering and quick list setup | Daily work, temporary filters |
| Change Form | Layout and structure customization | Columns, buttons, advanced filters |
Configure List does not change the structure of the form, only how data is displayed.
4. Advanced Customization (Change Form – Overview Only)
If deeper customization is required, users can use More actions → Change Form to:
manage visible columns;
adjust column order and titles;
configure fast filters;
customize command bar buttons.
These actions affect the form layout, not just filtering.
5. Saving and Restoring List Settings
Save Customized View
If you want to reuse your customized list:
Click More actions → Save Settings.
The system will save your personal list configuration.
Restore Default Settings
If you want to revert to the standard system view:
Click More actions → Restore Default Settings.
The list will return to its default layout and filters.
Best Practices
- Use Configure List for filtering and daily operations
- Use Change Form only when layout changes are required
- Save settings only if you plan to reuse them
- Restore default settings if the list becomes confusing
Thank you for being a FirstBIT customer!