To enable the employees to enter the data by using a barcode scanner, you need to add the barcode scanner to the system and configure the connection.
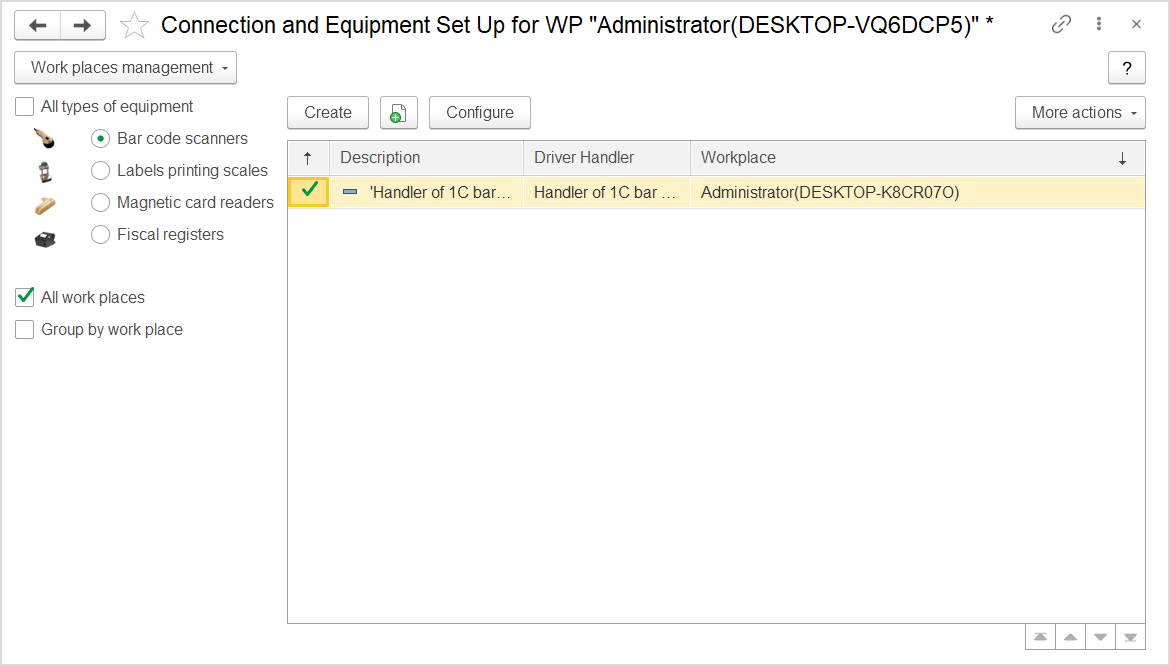
For this, click Administration > Master Data > Peripherals. The Connection and Equipment Set up for WP X form opens.

The Connection and Equipment Set up for the selected WP (Workplace)
To add a barcode scanner, do the following:
- Select the Bar code scanners radio button.
- If the scanner can be used anywhere, select the All work places option.
- Click Create to add a particular scanner. The Peripherals (create) form appears.

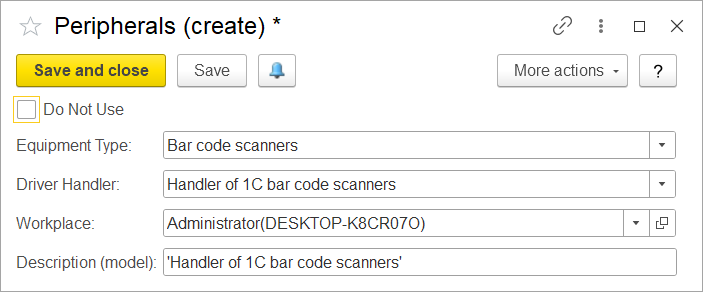
The Peripherals (create) dialog box
- Make sure that the Do Not Use check box is cleared for the new scanner.
- The Equipment Type field is populated with the Bar code scanners option.
- In the Driver Handler field, select the handler available in the application; by default, it is Handler of 1C bar code scanners.
- In the Workplace field, select an existing workplace or add a new workspace where the scanner will be used. Generally, workplace defines connection to the user computer and is created automatically.
- In the Description (model) field, you can specify the particular model if needed; by default, it is Handler of 1C bar code scanners.
- Click Save and close to save the settings and close the form.
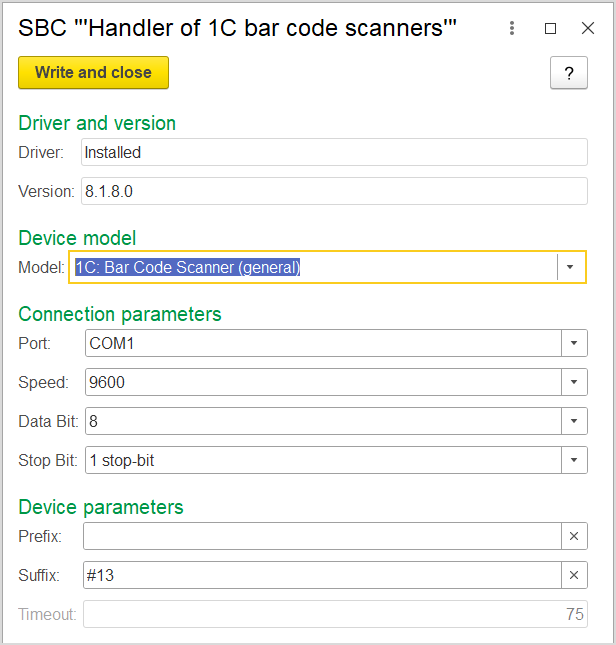
Click Configure to set up the scanner. The dialog box that appears is populated with the default data.

The SBC "Handler of 1C barcode scanners" form
Review the following connection parameters and change the values if needed:
- Driver: Indicates whether the driver is installed.
- Version: Make sure that the correct version of the driver is specified.
- Model: Specify the model of the scanner or its emulation component.
- Port: Serial port (physical or emulated) or keyboard to which the barcode scanner is connected.
- Speed: The data transfer rate (parameter of the port to which scanner is connected).
- Data bit: The number of data bits in a transmitted byte (parameter of a port to which scanner is connected).
- Stop bit: The number of stop bits per byte (parameter of a port to which scanner is connected).
- Prefix: The characters to be added by barcode scanner to each barcode on reading. Usually, it indicates the beginning of the barcode reading.
- Suffix: The characters to be added by barcode scanner to the barcode on completion of barcode reading.
- Timeout: The interval in seconds during which the program waits for the data from scanner.
Once the parameters are specified, click Write and close to save the data.
After that, the barcode scanner can be used at the specified workplaces with any documents that involve registering the inventory item movements.


