...
- Open the Import from Excel settings.
- Select the required date format from the available options. Open the list of available date formats in the Common formats folder. Select the date format that matches the format used for dates in your Excel file.
...
For each time type used in the Excel file, create a corresponding mapping to the required Work Time Type from the system.
Use the Overtime and Non-Working checkboxes to specify where the imported hours should be recorded in the Time Card line. Depending on the selected setting, the imported hours are assigned to the corresponding time type column, such as Regular, Overtime, or Non-Working.
For example, select Overtime for a time type that represents overtime hours. Leave both checkboxes unselected for regular working hours.
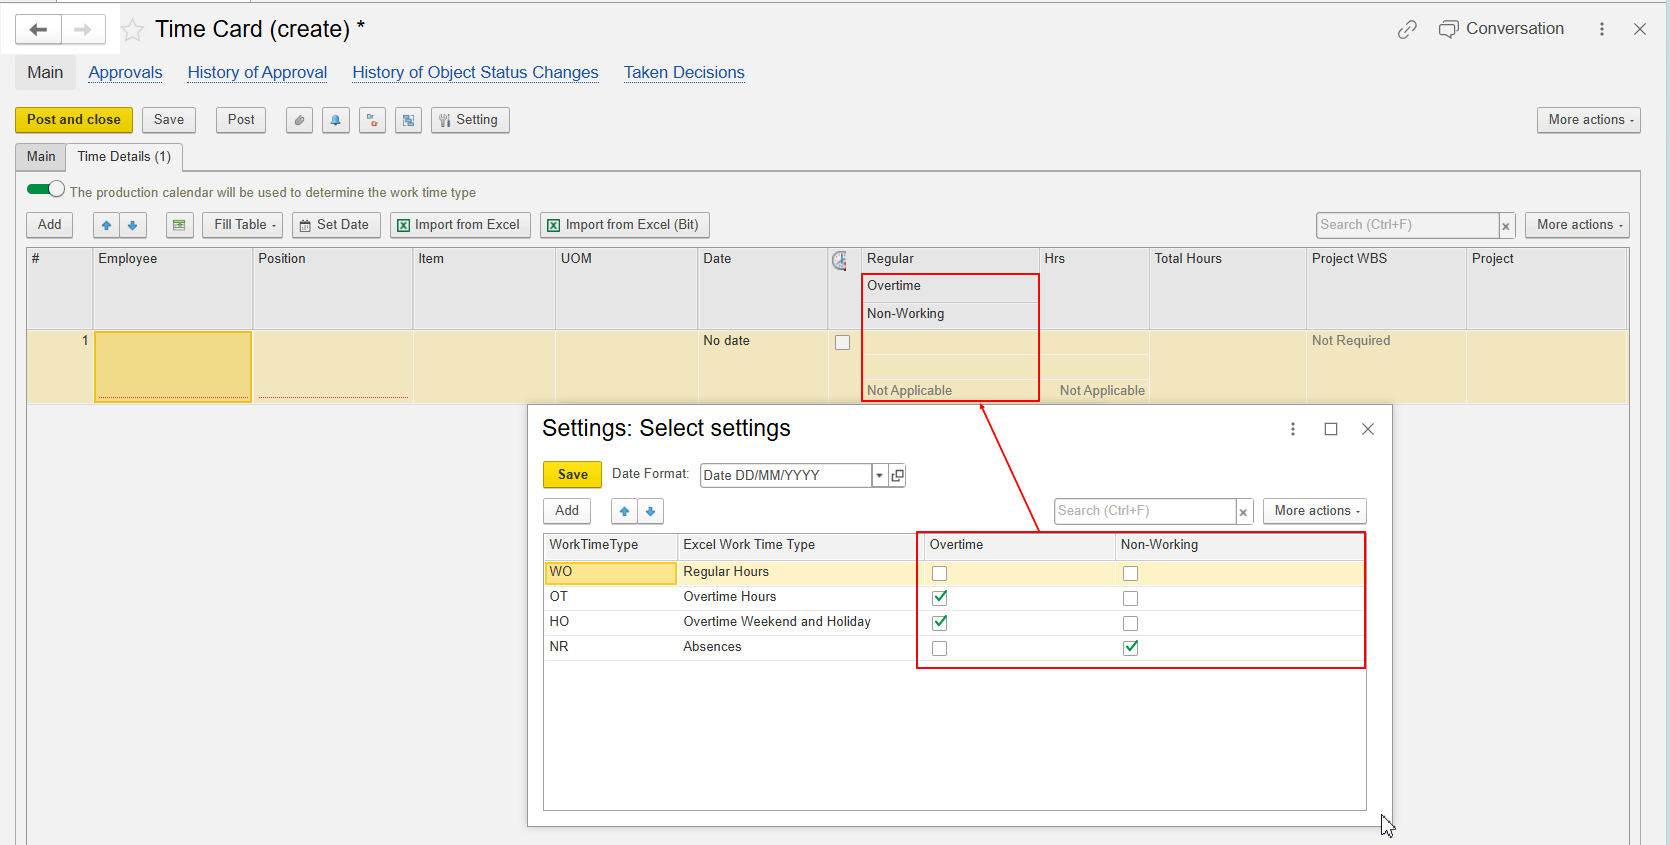
Important: The value entered for the Excel Time Type must exactly match the value used in the Excel file. The system considers letter case, spaces, and other characters when matching the value. If the value does not match exactly, the Time Type may not be recognized during import.
Example:
| Value in Excel | System Work Time Type |
|---|---|
| Working hours | WO |
| REGULAR OVERTIME | OT |
In this example, the values Working hours and REGULAR OVERTIME must be entered in the mapping exactly as they appear in the Excel file.
...
You can download the Excel template hereon this page or request it from FirstBit Hotline hotline@firstbit.ae , fill it in with your Time Card data, and upload the completed file to the system using the Import from Excel functionality.
...