This manual provides detailed instructions on how to enter post-dated cheque (PDC) opening balances and how to record the cancellation of such cheques.
Opening Balance
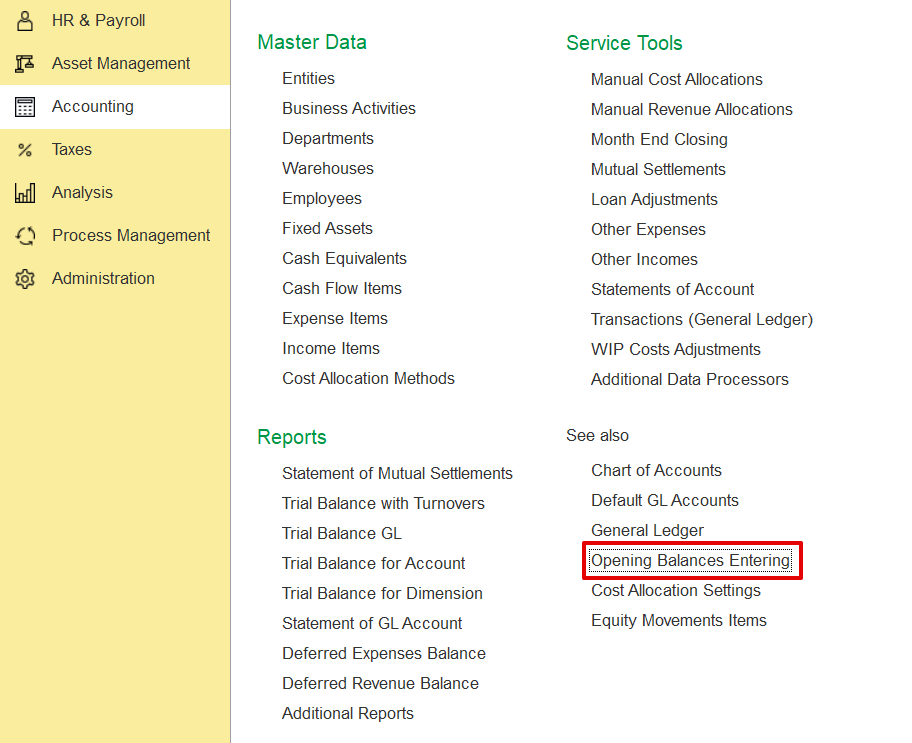
Accounting → Opening balance
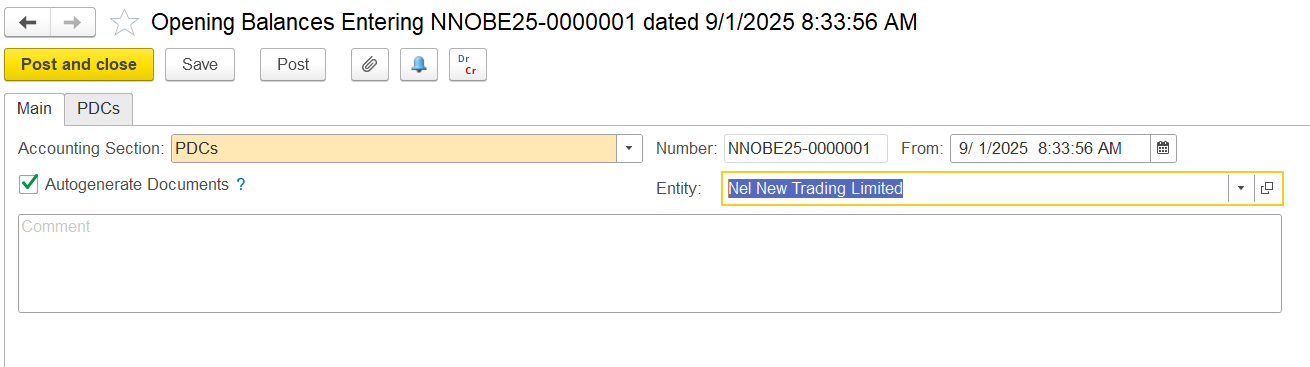
Create a new Opening Balance document. In the accounting section, select PDCs from the list. Enable Auto-generate Documents, and select the relevant entity.
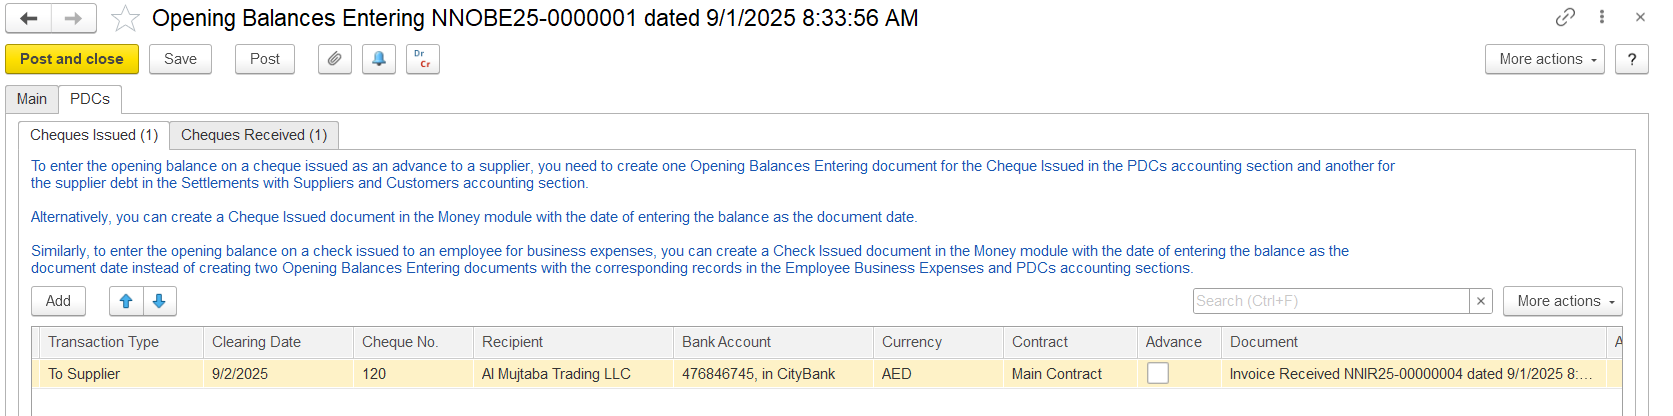
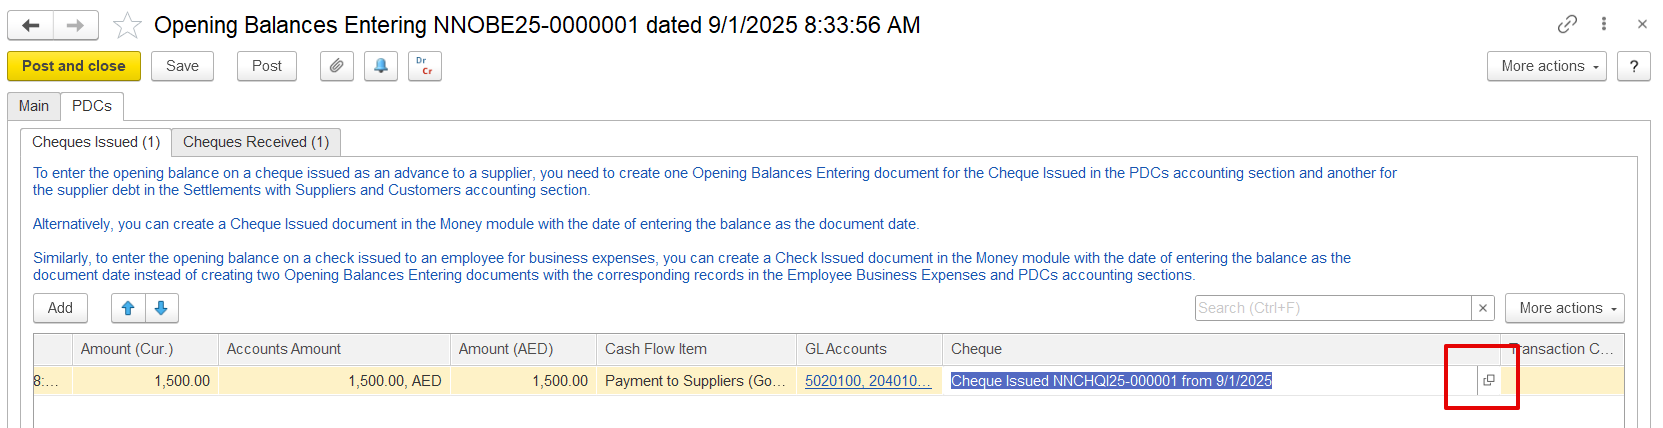
In the Cheque Issued tab, enter information about cheques issued by your entity before the start of operations in the application.
Fill in the required field
Transaction Type – To Customer, To Supplier, Employee Expenses, Loan to Employee, or Other (GL accounts applied automatically).
Clearing Date – the date the cheque can be cleared.
Cheque No. – cheque number.
Recipient – company or employee receiving the cheque.
Bank Account – select or create an account (currency auto-filled).
Contract – link if To Supplier or To Customer.
Advance – check if it’s a customer advance.
Document –
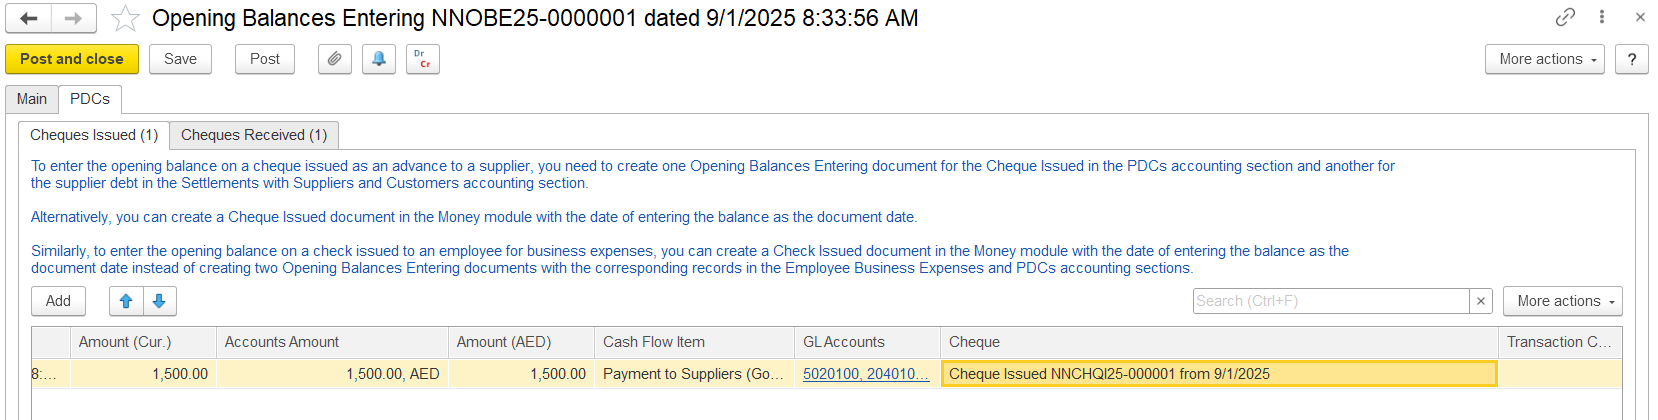
<Auto>assigns a document automatically.Amount (Cur.) – cheque currency.
Accounts Amount – converted to contract currency.
Amount – converted to accounting currency.
Cash Flow Item – default or select another.
GL Accounts – applied automatically.
Cheque –
<Auto>generated.Transaction Content – optional comments.
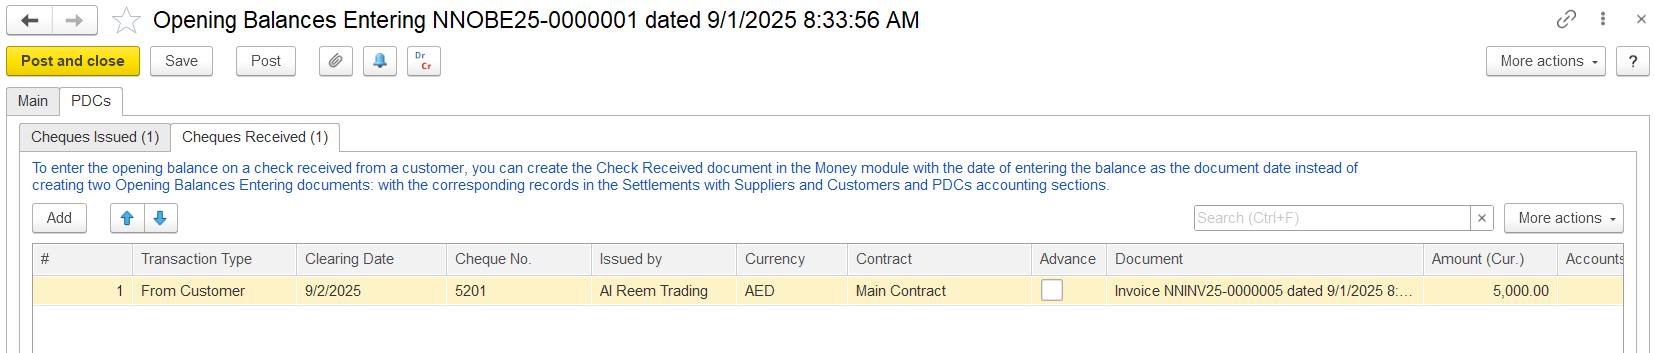
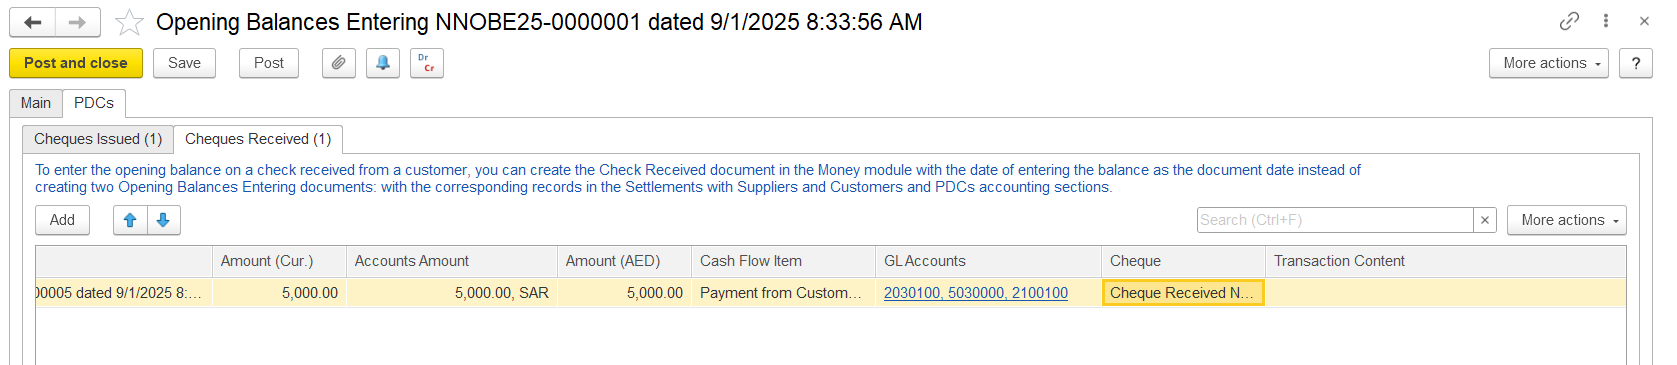
In the Cheque Received, enter cheques received before the start of operations.
Fill in the fields:
- Transaction Type – From Customer, From Supplier, Return of Prepaid Employee Expenses, Employee Loan Payment, or Other (GL accounts applied automatically).
- Clearing Date – the date the cheque can be cleared.
- Cheque No. – cheque number.
- Issued By – company or employee providing the cheque.
- Currency – select manually for Employee Loan Repayment; auto-filled for Customer/Supplier.
- Contract – link for From Customer or From Supplier.
- Advance – check if it’s an advance to the entity.
- Document –
<Auto>assigns number automatically. - Amount (Cur.) – cheque currency.
- Accounts Amount – converted to contract currency.
- Amount – converted to accounting currency.
- Cash Flow Item – default or select another.
- GL Accounts – applied automatically.
- Cheque –
<Auto>generated. - Transaction Content – optional comments.
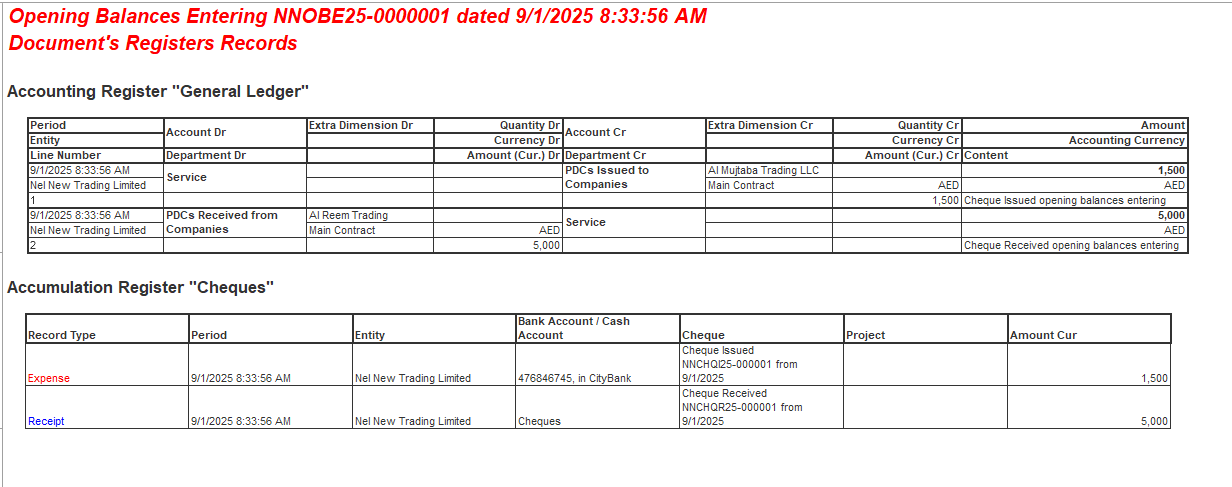
Once all details are filled, post the document. The below journal entry will be created.
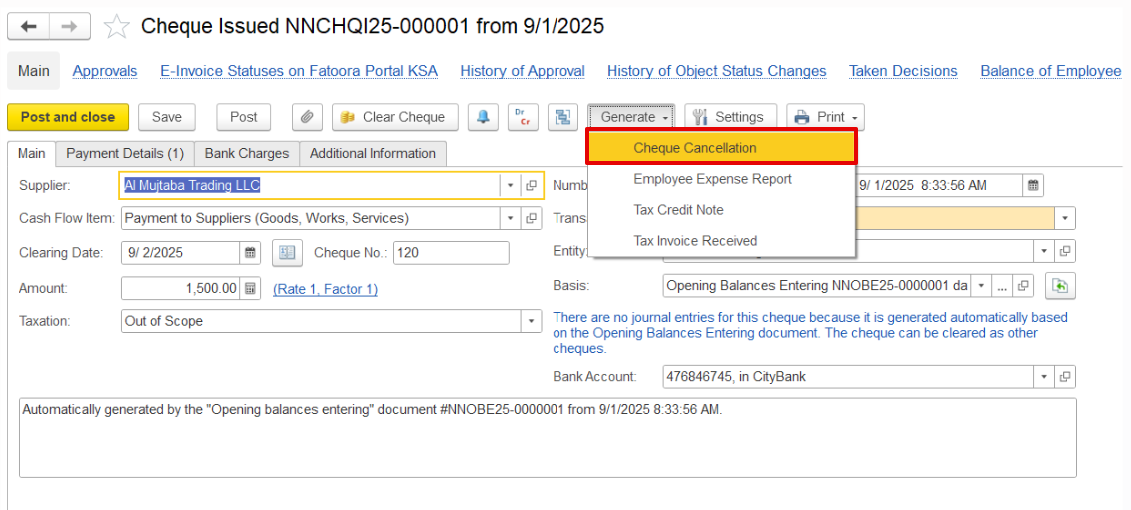
Cheque Cancellation
If a cheque document created through the opening balance needs to be cancelled, generate a cancellation document. This feature is available in version 2.1.1.35 and above. To do this, open the cheque document and select Generate > Cancellation.
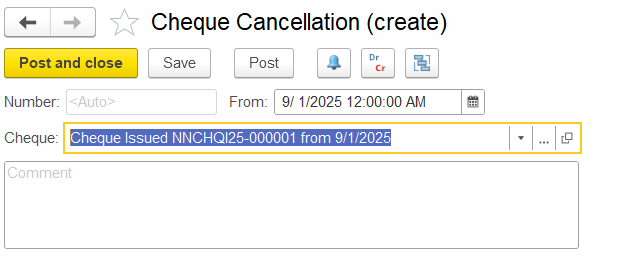
This action will create a new cancellation document. The system automatically assigns a number (<Auto>), and the From field is filled with the current business date, which can be changed if necessary. In the Cheque field, select the related document (Cheque Issued or Cheque Received) that is being voided. Additional details can be entered in the Comment field if required.
After filling in the details, post the cancellation document. The system will generate the corresponding journal entry. Since this is a cancellation of a cheque issued, the GL account of Trade Payables will be affected, as the invoice received remains payable.

Thanks for being a Firstbit Customer!